The Essential Guide to Airbnb

My sister and I figured that we’d be staying in hostels during our journey in Europe. We’d share rooms with 8 strangers and sleep in rooms of dubious cleanliness. It’d be overpriced and somewhat uncomfortable.

And then we discovered Airbnb.

post 187 image 14

Airbnb is a website where people rent out lodging. I’m not talking about those hotels and motels: people rent out their apartments, houses, even spare rooms in their own home. Often, for what you get, Airbnb can be relatively cheap. With many Airbnb listings being equal to or cheaper than hostel prices, we were definitely interested in using the site.

My sister and I did a lot of research and ended up using Airbnb for the majority of our Eurotrip. Using Airbnb can be daunting, though. With over 500,000 listings in over 190 countries, it’s tough to know what place to choose. My sister and I stressed over it quite a bit.
post 187 image 16

After going on our trip and staying at all these apartments, we are glad to say that our Airbnb experience was positive! Though, there are some things we wish we knew before booking some of those places. It’s hard to know when you’re using Airbnb for the first time.

So, I’m going to list a few things my sister and I looked for when we booked our Airbnb apartments. Everyone’s experiences will be different, so I can’t promise anything– but hopefully these tips will help your Airbnb experience go a little smoother.

Verify your identity.

You can book places without verification, but nobody’s going to rent to you if they don’t know you’re a real person. Airbnb lets you prove your existence in a number of ways.

post 187 image 17

The most important is to provide an offline form of identity, usually in the form of a government-issued driver’s license or passport.

Now you’re ready to start booking!

post 187 image 18

Obviously, pick one with good reviews.

Airbnb sends out professional photographers to take verified photos for the site. These guys are pros. Some of the apartments on Airbnb look beautiful, and often, they are!

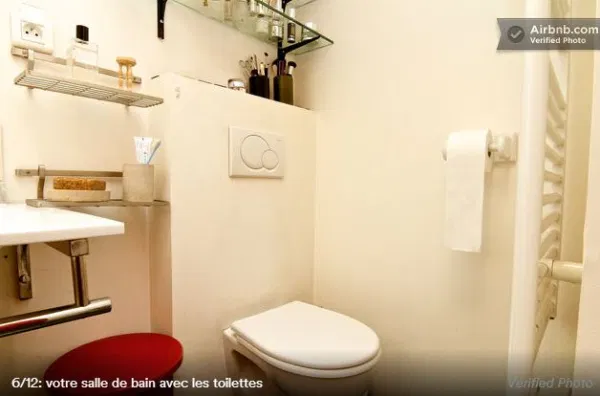
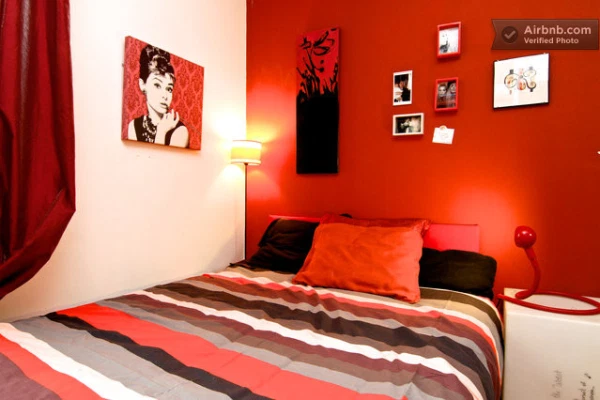
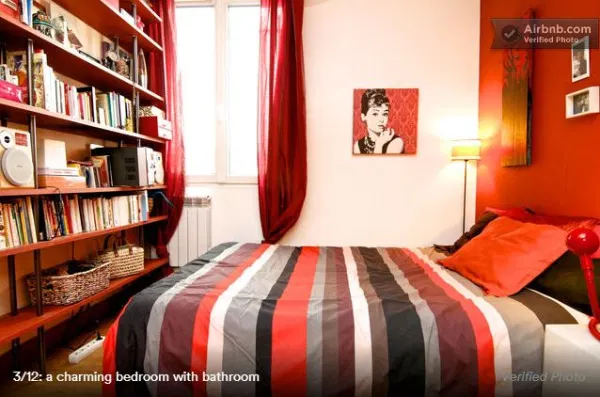
Just for a comparison, here’s the Airbnb photos of the apartment my sister and I stayed in Paris…
post 187 image 1

post 187 image 2

post 187 image 3

…compared to the photos I took myself.
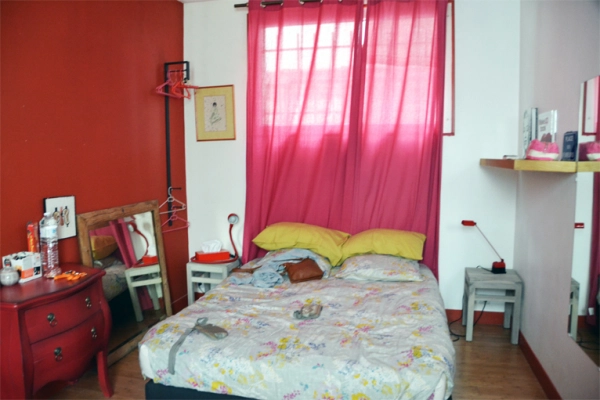
The bedroom.

The bedroom! Don’t get me wrong: this Parisian apartment was one of my favorite places we stayed in.
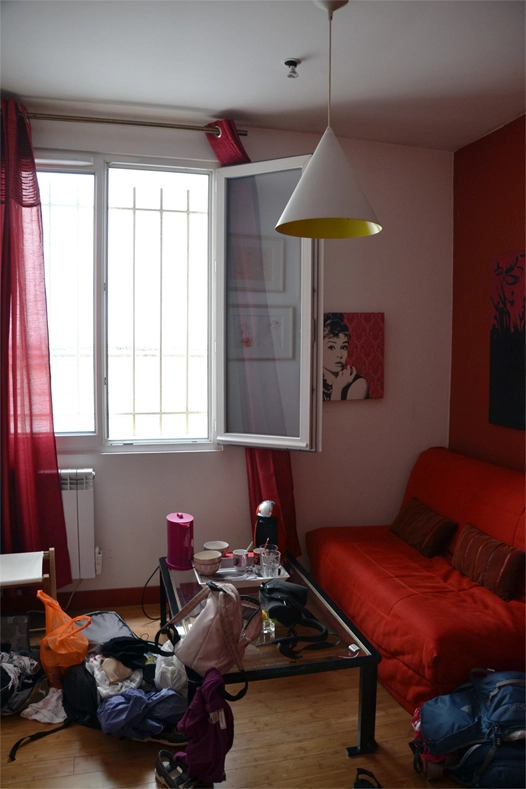
The other part of the bedroom, covered with our luggage. This wasn't actually pictured in the Airbnb photos.

The other part of the bedroom, covered with our luggage. This wasn’t actually pictured in the Airbnb photos, so the table and the couch were a nice bonus.
post 187 image 4

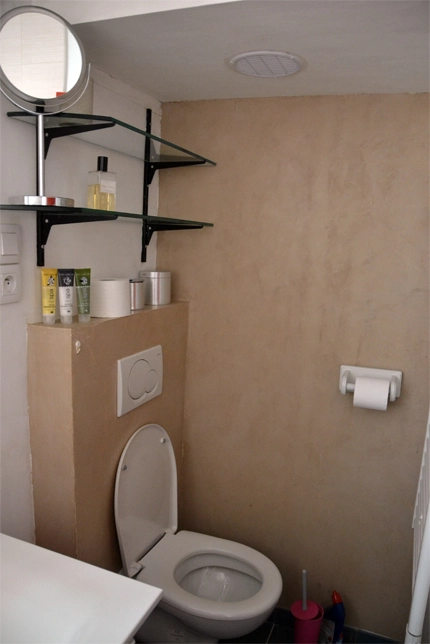
The bathroom: it was a bathroom.

You can see that what the site tells you isn’t always exactly what you get. A good way to know for sure is to read reviews! Ideally, the apartment or house has had a lot of guests and a lot of reviews. Our Parisian apartment had a high rating, which I would totally agree with.

post 187 image 7

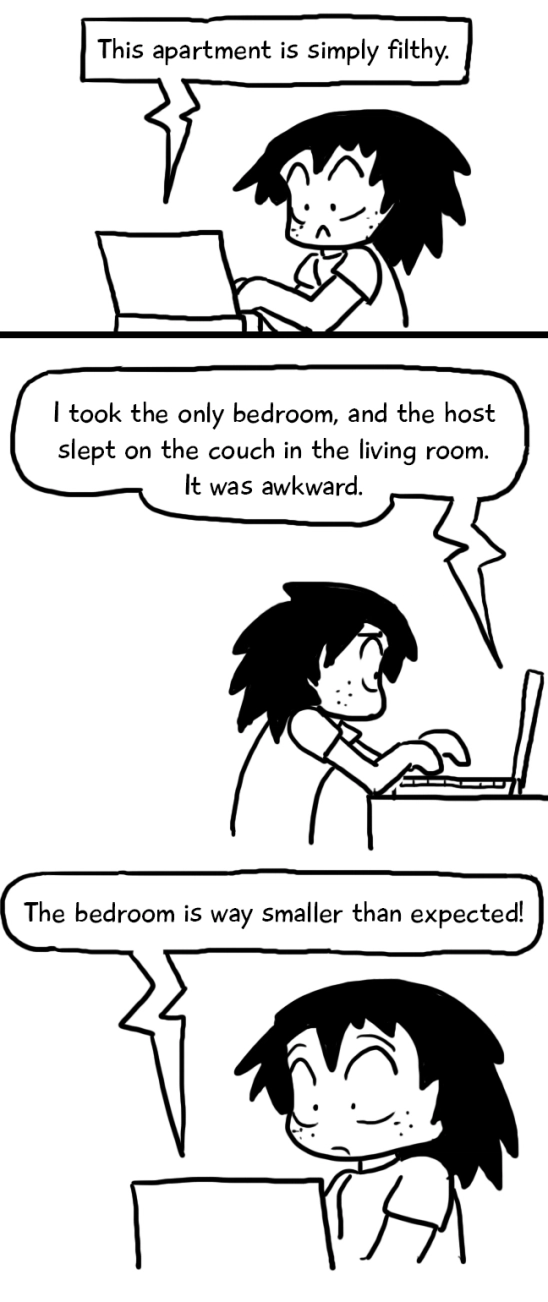
Sometimes, though, you’ll discover less positive feedback.
post 187 image 19

So read your reviews! My sister and I played it safe, going only for listings with a lot of positive reviews.

Look for a high cleanliness rating.

An Airbnb is not a hotel, so you really can’t expect hotel cleanliness. Sometimes, you might even be sharing a kitchen or a bathroom with your host.
post 187 image 20

I’m not the cleanest person, myself, but being in someone else’s messiness always makes me a bit uncomfortable. Anything less than a 5-star cleanliness rating means the place probably isn’t spotless, if that’s what you’re looking for.

Double-check the location.

When you’re booking an apartment in an unfamiliar city, it’s hard to tell how good the location is just by staring at Google Maps.
post 187 image 21

A nice indicator is that the farther you get from center city, the cheaper the apartments become.
post 187 image 22

And my sister and I did book one without really looking into the location. It was our first booking, for a lovely and cheap apartment in London. Or, wait. Look at that address. Is it really in London?
post 187 image 23

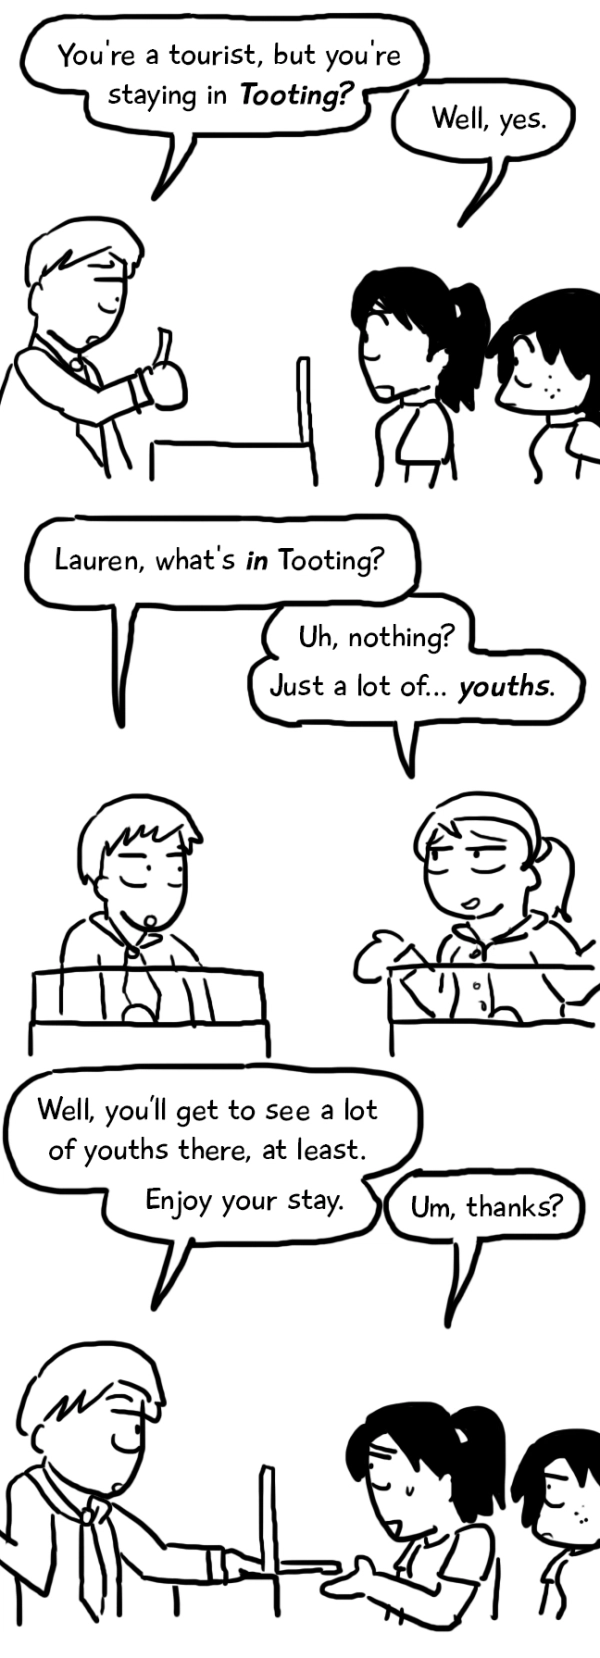
When we landed at London-Heathrow, the passport security was baffled.
post 187 image 24

My sister and I had booked a place in the London suburbs, not London itself. Luckily, we had at least done enough research to…

Check the proximity to public transport.

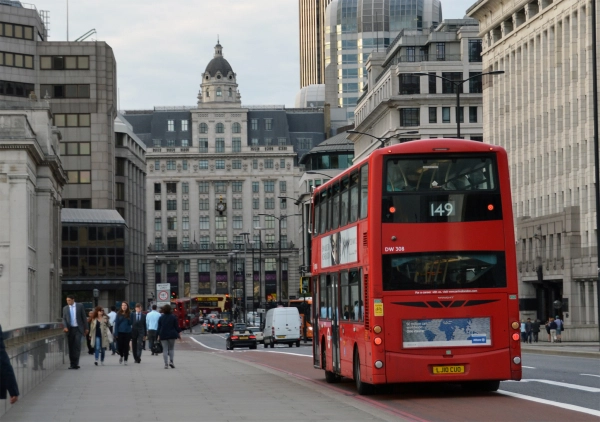
Our apartment in Tooting was a 15 minute walk to the subway, and a 10-minute walk to the public buses. It took us, then, at least an hour to get all the way to London’s most famous attractions. But at least there was transport: if we hadn’t had such convenient access, getting around a big city like London would have been difficult.

Besides, it was a good excuse to spend an hour on one of London’s famous double-decker buses.
post 187 image 25

post 187 image 26

Watch out for hidden fees.

The price listed on Airbnb is not always the final price. Sometimes, there are “cleaning fees.”

post 187 image 9

post 187 image 27

Sometimes, the host will charge a bit extra for every extra guest you bring in. For instance, the dude below will charge you the list price for two guests. But to bring a third friend, you’d pay an extra $13, and another $13 for a fourth friend… yeah. You get it.

post 187 image 8

Sometimes, the host will ask for a security deposit.

post 187 image 10

post 187 image 28

My sister and I avoided listings with security deposits, so I unfortunately can’t give any advice about dealing with those. Also, since most listings were made to accommodate two people, my sister and I never had to pay that extra guest fee.
post 187 image 29

So those extra fees never caused us any trouble– but it’s certainly something to look out for when you’re booking a place.

It’s also worth checking out the apartment’s cancellation policy. Are you a wandering soul with no strict travel plans? Check the cancellation policy of the apartment to make sure that you’ll be refunded in the event that you change your mind. Airbnb cancellation policies come in the shades of flexible, moderate, strict, super-strict, and long-term. You can read more about that here.

Privacy is really nice.

Well, depending on what style of traveler you are. Some people have plenty of time, and just love to chat it up with whoever’s around. Talking to your host can actually be great– they can give you recommendations only a native would know. And shared rooms give you the chance to hang out and chill with other travelers

My sister and I, however, had barely any time at all in each city.

post 187 image 30

At the end of the day, we just wanted somewhere to relax and unwind. When you’re that exhausted, having your own room to just chill is really nice– no need to tiptoe around sleeping strangers.

post 187 image 31

It all depends on you, but we found that having our own room really enhanced our trip. A little comfort goes a long way, and Airbnb helped us afford the luxury of our own room.

You get what you pay for.

That said, not all Airbnb listings are created equal. There are a huge variety of apartments you can find, the quality and price of which differ greatly.

You could rent this entire apartment for $200 a night…

post 187 image 11

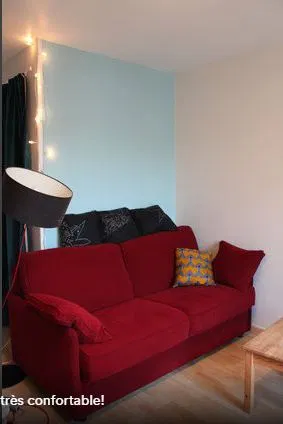
…or this girl’s couch for $57 a night.
post 187 image 12

What a steal!

My sister and I found a really cheap place to stay in Rome. The host described it as a “beautiful bright dorm” that was part of a “big, lovely, classy and fun apartment.” With all those superlatives, it HAD to be good.

post 187 image 32

The reviews were all positive, and the price couldn’t be beat. We were going to have to share a room with two other strangers, but we figured that we could deal with that for a few nights.

And we could. That was fine– we bunked with two lovely girls from Texas. It was the apartment itself that was a problem.

post 187 image 33


The apartment was pretty much falling apart. It was nicely decorated, at least– it was lived-in and frequented by artsy hipsters. But, hey: it was cheap! You could tell.

The extra little conveniences go a long way.

At least, they did for my sister and I. Firstly, we were backpacking. We only brought a week’s worth of clothes for a five-week trip.

post 187 image 34

So, whenever we had washing machines, it was a godsend.
post 187 image 35

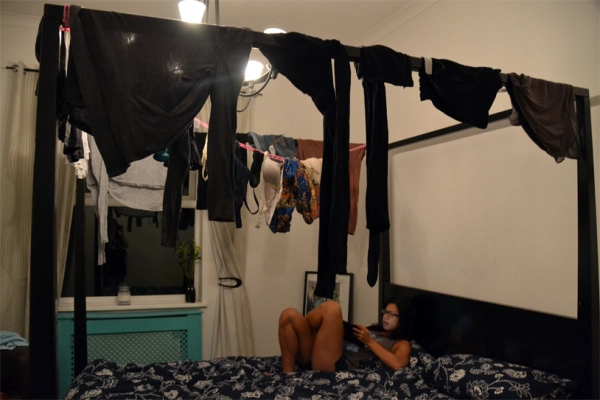
Before you believe that we were totally smelly, though, I’ll tell you that my sister and I washed our clothes every day! Washing machine or not! When there was no washer available, we just washed our clothes by hand. It was a process, involving us carrying around laundry detergent, scrubbing out our clothes, rinsing them out, and drying everything on my sister’s travel clothesline.
post 187 image 36

Washing machines: I appreciate them now. And if you’re traveling light, you will too! They’re really handy if you don’t have enough clothes for the entire trip.

Since we were trying to keep our expenses down, we would often buy lots of food from the grocery store. We would usually need a place to keep this food. The second convenience to look for: Refrigerators. Under the Airbnb listing, look for a kitchen, and read the reviews and description.

post 187 image 37

And finally, check if your place has internet! We take it for granted these days, but my family actually stayed in an apartment in Budapest without WiFi. For those two nights, my family bemoaned the fact that we couldn’t look up directions or tourist attractions.

post 187 image 38

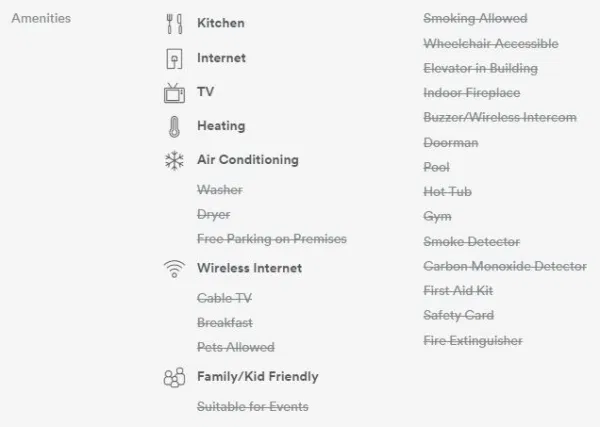
Airbnb has even made it easy for you. Hosts can show which amenities they do and don’t have.
post 187 image 13

Communicate with your host.

Did you read the description, check the reviews and have finally decided on a place? Awesome! Now you can try to book for the dates that you want.

However, even if your desired dates are available, you can’t book instantly. You have to talk to your host first. Introduce yourself, tell them what you’re dropping in town for, be polite. Then, you’ll receive a confirmation message when your host accepts your booking.
post 187 image 39

Some places can be booked instantly, though. Look for the lightning icon next to the price.

post 187 image 15

Be a good guest!

You can leave reviews for your hosts. Reversely, your hosts can leave reviews of you once you’ve stayed in their apartment. If you rack up a string of bad reviews, people are less likely to rent to you. So be a good guest! If your host requests you to do something, like close the door gently or be quiet at night, do it. Don’t be a college freshman in a dorm.
post 187 image 40

It’s really just common courtesy. Most importantly, remember: you’re staying in someone else’s house. Sometimes, they have maid service. But if you’re staying somewhere cheaper, the likelihood is that they clean the place themselves.
post 187 image 41

And that’s it! Those are just my little tips on things to look out for when renting your Airbnb. It’s not an exhaustive guide, but hopefully it’ll help out some prospective travelers. I was lucky enough to have a great time. But who knows? When I travel again, my experience with Airbnb might be better. It might be worse. But at this point in time, I know this: I’ll be using Airbnb again soon.

Renting a campervan in New Zealand: Tips and tricks to avoiding utter chaos

The University of Sydney, like any university, gives their students a break mid-semester. My friends and I wanted to do something with that break.

post 183 image 16

My friends and I decided that “something” would be to travel. While we were in Sydney, why not hit up Australia’s next-door neighbor? New Zealand is world-famous for its natural beauty. The amazing scenery in all three Lord of the Rings films? All shot in New Zealand.

post 183 image 17


Our time was limited, so we decided to travel only New Zealand’s south island. But how would we get around? The majority of New Zealand lives on the North Island. The south island, on the other hand, is sparsely populated. We decided to be extra-adventurous and rent a campervan for our trip.

post 183 image 18

It sounded like the perfect 20-something, idyllic college adventure. Don’t get me wrong: it was an adventure. And like any adventure, not everything went as smoothly as we planned. After this trip, I came to realize that not everything about travel is smooth sailing. A little foresight would have gone a long way for those 10 days in the land of Kiwis. So for the reference of future travelers looking for a fun and exciting trip ti NZ– here are some of the things I wish I knew going:

You get what you pay for.

Campervans are popular in New Zealand and get booked out way ahead of time. Do your research early, especially if you’re on a budget.

While doing your research, keep in mind that some vans are cheaper for a reason. Check reviews of the rental company. Check how old the campervan is.
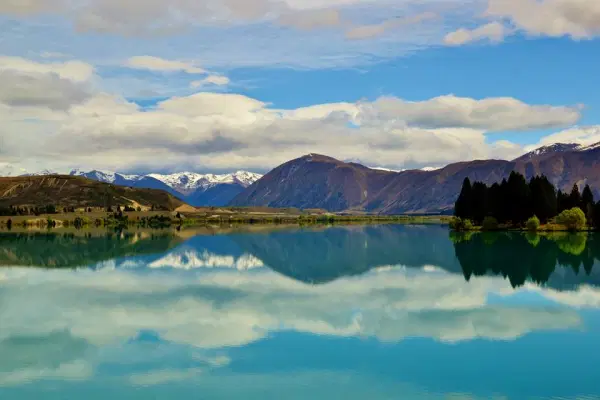
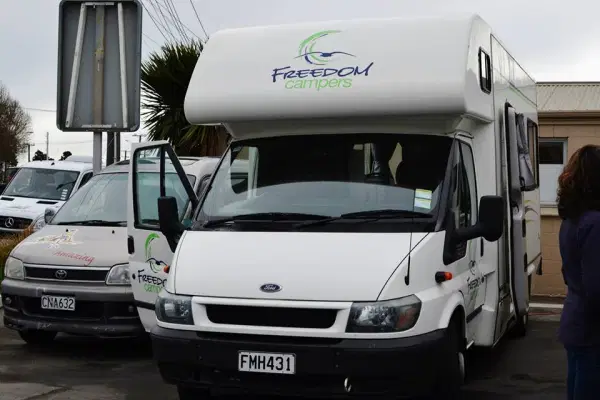
My friends and I got lucky. Though we booked our van pretty late, it wasn’t a total lemon. In fact, we were really excited when we saw our van!

post 183 image 1

post 183 image 19

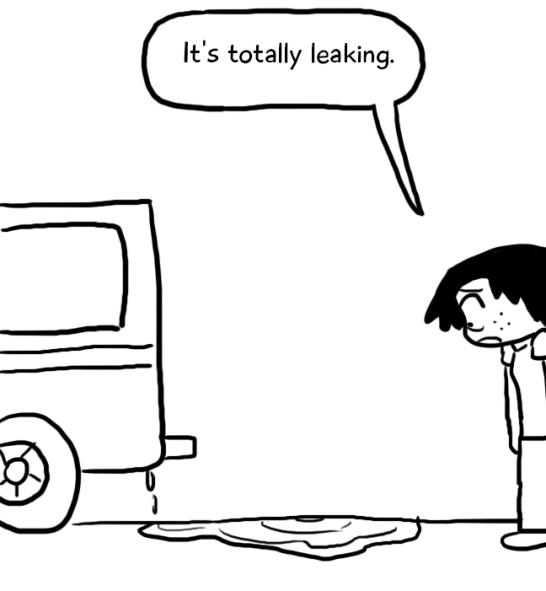
However, we found a few problems. Our campervan had a working sink and shower, connected to a water tank in the van. But when we tried to fill it up…
post 183 image 20

Our van would leak water until the tank reached about half its capacity. This wasn’t too much of a problem for us, though since we usually stayed at campgrounds with bathrooms. However, our second problem was much worse.

post 183 image 21

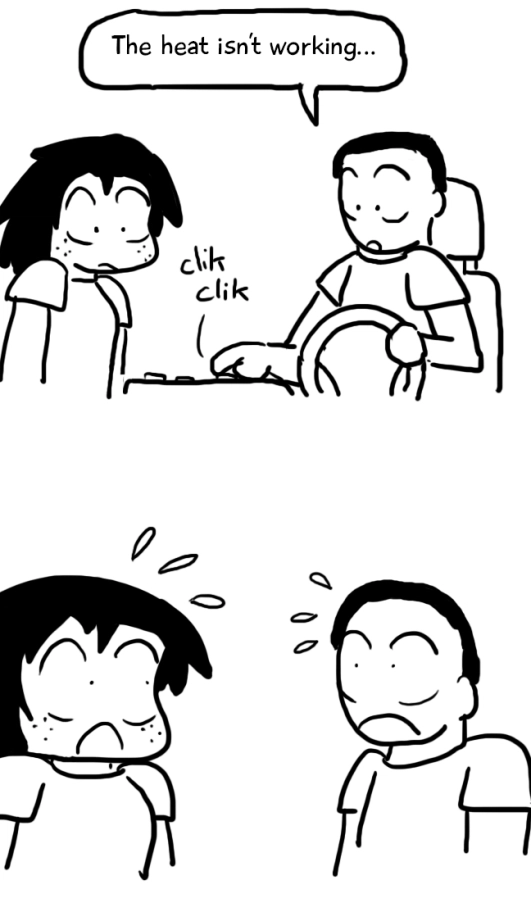
The heat in our campervan didn’t work, not even once. During that time, the weather averaged around 50-60 degrees during the day and got even colder at night.

post 183 image 22

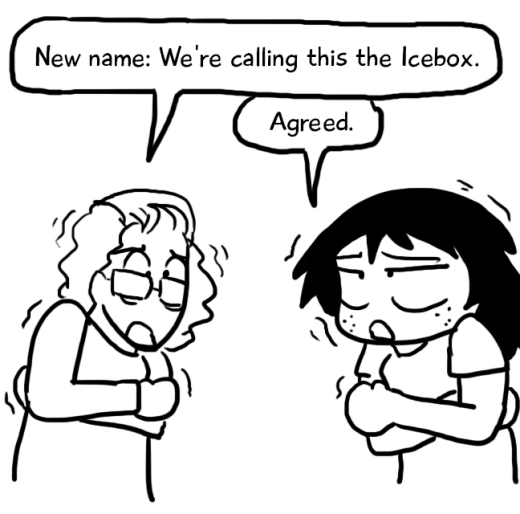
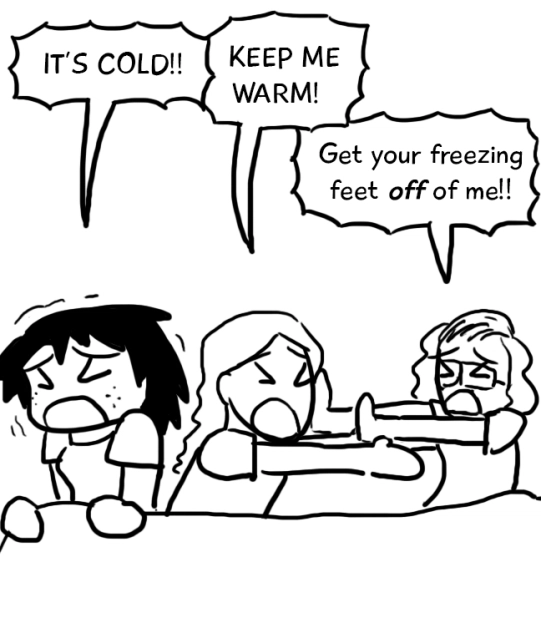
We found a small heater fan under the sink that staved off the worst of the shivers, but the Icebox was always a bit chilly. At least this led to great bonding time.

post 183 image 23


Figure out how you’re going to navigate.

We rented a GPS with our company and drove off happily, thinking it would solve all our problems. Then, we turned it on.

post 183 image 24

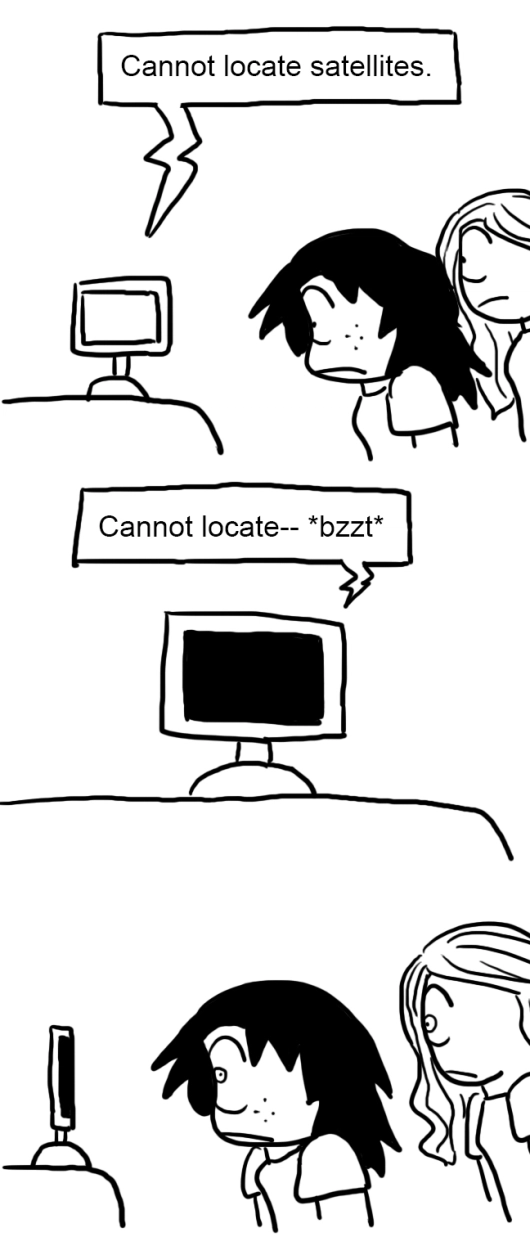
Our GPS was old, broken, and incapable of guiding us anywhere. My friend had the foresight of downloading an offline navigation app onto his phone. The only problem was that, though the app could navigate offline, it needed internet to locate our desired destination.

post 183 image 25

My advice? Figure out a data plan for your phone, preferably one with a reliable navigation app, before you depart. You don’t want to get knocked with high roaming bills. Nor do you want to get lost.


Check the New Zealand travel website.

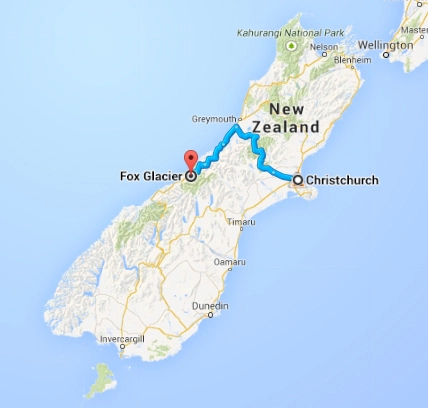
My friends and I were overly ambitious. Our first day of travel had us drive from Christchurch, on the east coast, all the way over to the west coast.

post 183 image 26

The most direct road to get there was through Arthur’s Pass. Google Maps predicted that the trip would take 5 hours. As we drove, though, we found that the route was a winding, meandering mountain road.  We were forced to drive slowly to avoid hurtling off a cliff. As a result, the trip took 8 hours instead of 5.

post 183 image 27

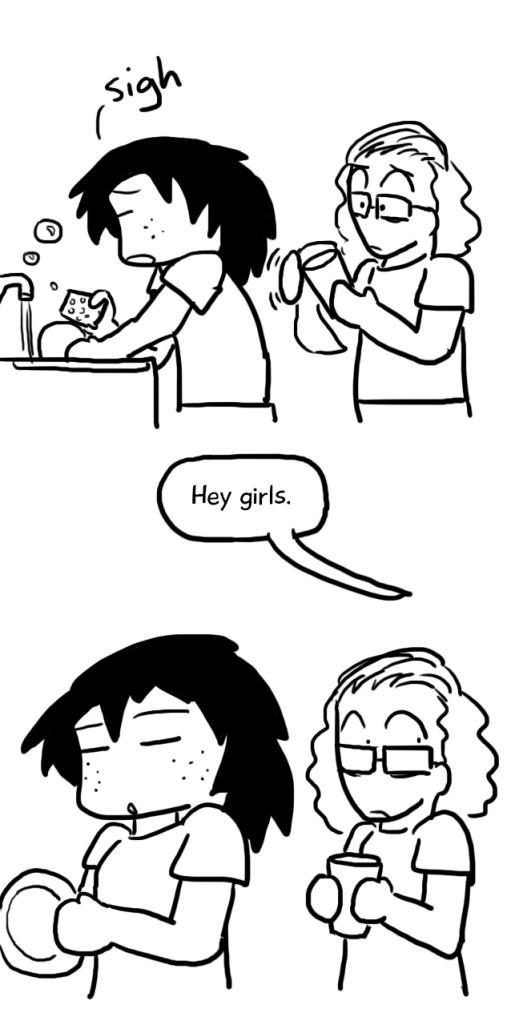
Late that night, we finally arrived at our campsite. We made a quick dinner and got ready for bed. My friend and I went to the campsite lodge to wash our dishes.

post 183 image 28

The campsite caretaker visited us in the lodge, curious to see who was doing dishes at 11PM. He struck up some small-talk.

post 183 image 29


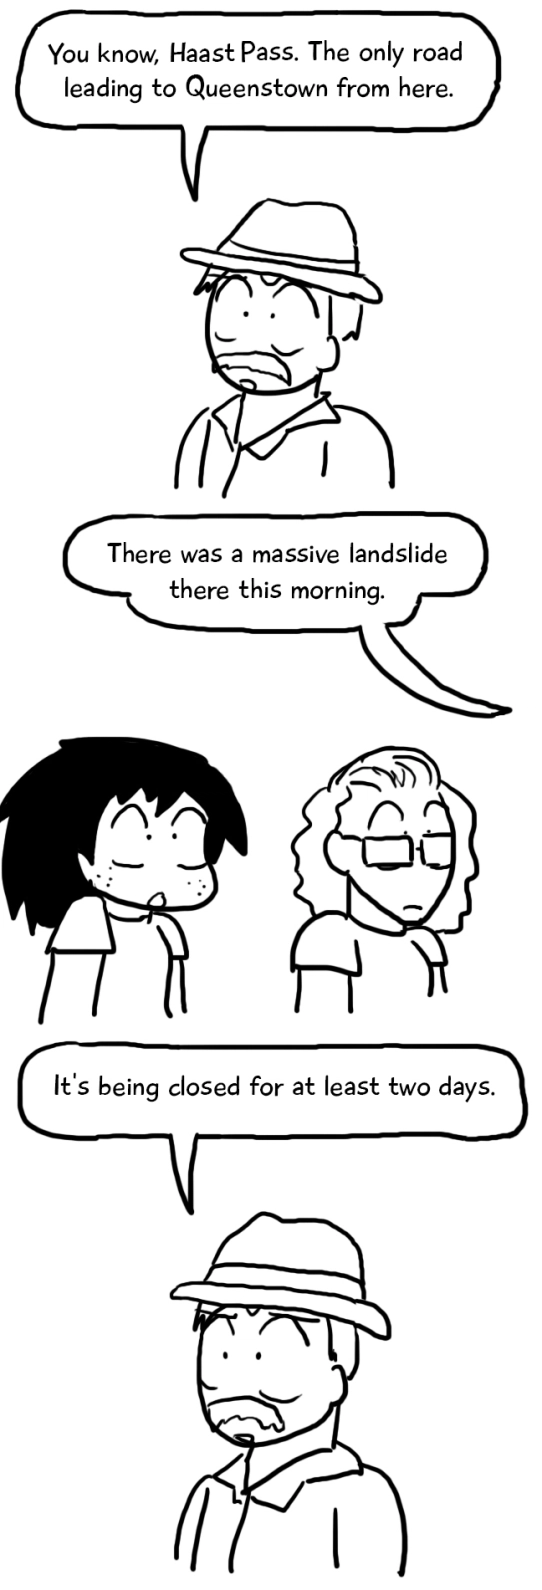
The caretaker elaborated.

post 183 image 30


Wait. What? The only road, closed? But we had to get to Queenstown. We had bungee jumps and skydives booked there! We were on a schedule!

post 183 image 31

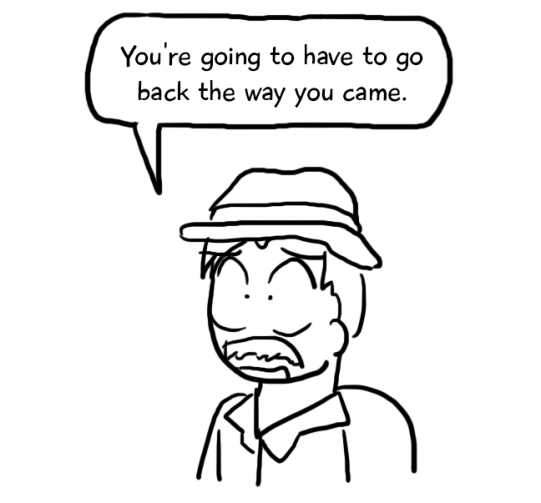
He said what I didn’t want to hear.

post 183 image 32

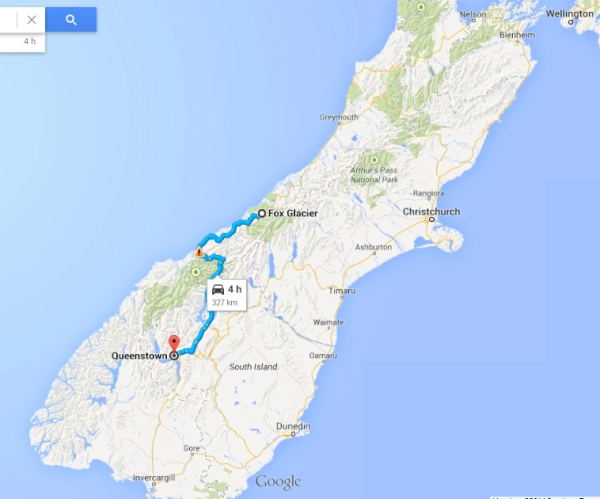
Suddenly, our planned route went from this

post 183 image 34

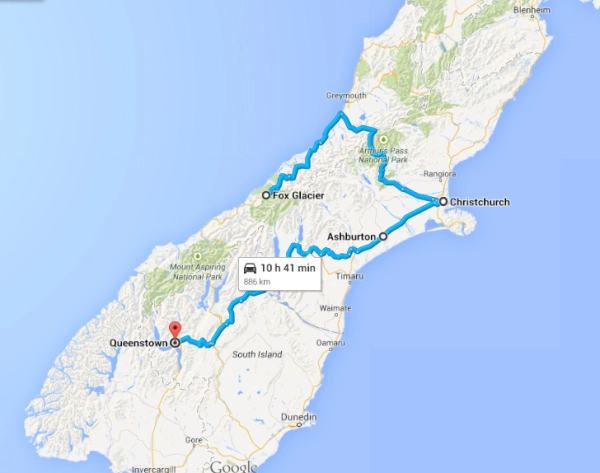
to this: 

post 183 image 33

In other words, a 4 hour ride suddenly became an 11-hour one. To make it to Queenstown on time, we were going to have to drive.

post 183 image 35

Which brings me to my next point.


Don’t over-plan.

We had our whole game plan outlined when we went to New Zealand. In retrospect, this wasn’t the best idea. We sacrificed the liberty to wander where we wanted.

post 183 image 36

And, of course, there was the Haas-Pass-landslide fiasco.

post 183 image 37

Our overplanning may have caused us to rush around. A lot.

post 183 image 38

These long rides led to another problem.


Carsickness can happen.

When you’re driving down those winding, twisting mountain roads, bouncing around in the back of a bumpy campervan, you’re bound to be a little uncomfortable.

post 183 image 39

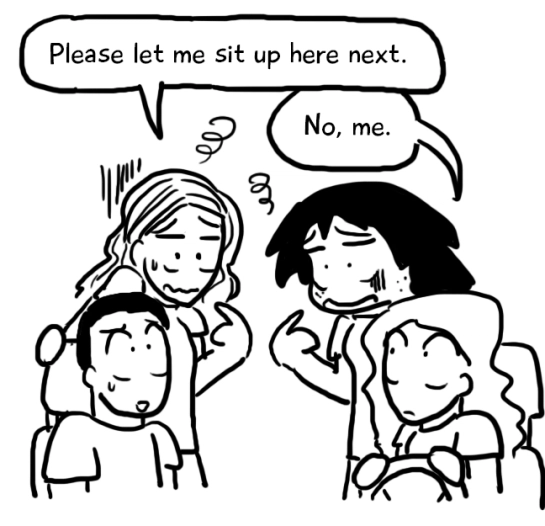
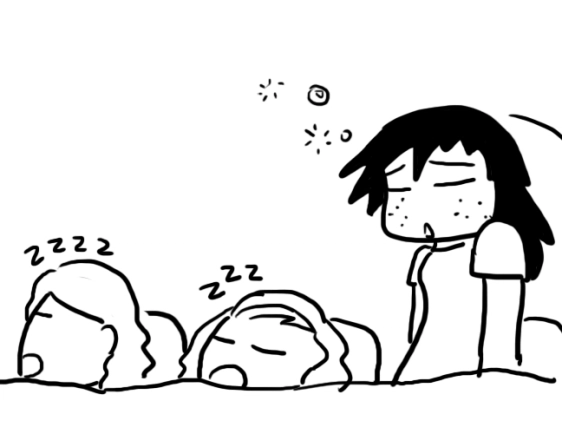
My friends and I hoped to read, play cards, or do things while riding around. Mostly, though, we just sat back and slept. There was no other way. We took turns sitting in the front with the driver, just to help with the nausea.

post 183 image 40

Remember that you can’t camp just anywhere.

The national law in New Zealand allows freedom camping– aka, pitching your tent wherever you want– in any public space. However, local laws have limited the areas where camping is allowed. Trying to find out where you can and can’t stay can get confusing.

And don’t forget that your campervan needs some tender love and care. You’ll need somewhere to dump your waste, fill up your water tank, and charge the van’s battery every few days. This usually means booking a campsite.

My friends and I played it safe and made sure that we had a sanctioned campsite to stay at… most nights.

post 183 image 41

It’s a lot less stressful when you’ve got a set place to go.

You also can’t park your campervan just anywhere.

Basically, don’t do this:

post 183 image 4

Seriously, don’t drive your van into any sort of grass until you know it’s solid. There won’t always be a group of friendly tourists willing to push your van out of the mud.

Give yourself time to take it all in.

Our trip to New Zealand was one of the craziest experiences of my life. We got lost. We got sidetracked. We raced around the entire island. We panicked and freaked out.

Our trip to New Zealand was also one of the most incredible experiences of my life. I’ve yet to visit a place that can match NZ’s natural beauty. We often in such a rush that I forgot to look around me– but when I did, it always took me by surprise. Like it did in Queenstown.

After arriving in Queenstown at 4 in the morning, we  finally found a parking lot without a “No Camping” sign. It was too dark to see exactly where we were, but were too tired to care. We parked the car, locked the doors, and went to sleep. A few hours later, I woke up and groggily crawled out of bed.

post 183 image 42

By some miracle, we had chosen a parking lot with a public bathroom next door. I grabbed my toothbrush and headed outside.

post 183 image 43

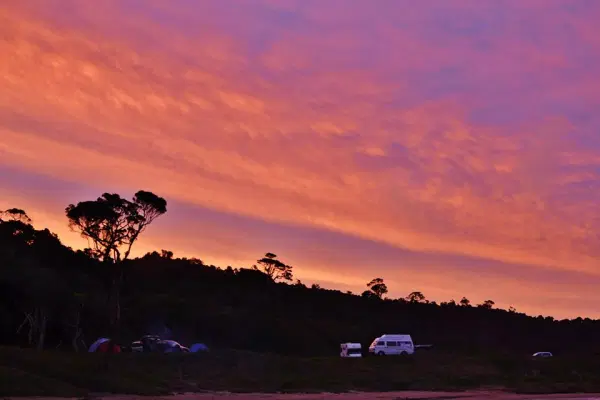
It was here that I brushed my teeth and greeted the morning.

post 183 image 2

post 183 image 44

And this was only a taste of the amazing little Queenstown.

post 183 image 11

post 183 image 12

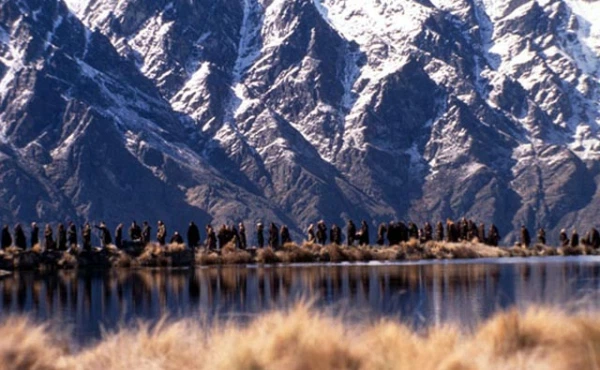
That was just one of the many incredible things we saw. Our first day, driving to the west coast through the insane Arthur’s Pass, we also stopped for a bit. We had to. We needed a moment to appreciate what we were seeing.

post 183 image 3

Here’s another place we needed to stop and appreciate:

Lake Ruataniwha-- the name of which I didn't know until I Googled it later.

Lake Ruataniwha, which we hadn’t heard about in any travel guide. I didn’t know its name until I Googled it later.

And another:

Nugget Point, New Zealand.

Nugget Point, New Zealand.

And another.

post 183 image 7

Lake Pukaki, New Zealand.

The campervan allowed us to access places we wouldn’t have been able to otherwise. For instance, we stayed a night at Purakaunui Bay, located in the Catlins Coast. The campground was basic: hole-in-the-ground toilets, water that needed to be boiled before drinking, and absolutely no lights. We went to sleep with the sunset…

post 183 image 8

…and woke up with the sunrise.

post 183 image 9

post 183 image 10

Our trip was organized chaos. Would I do it a little differently if I went back to New Zealand? Sure thing. Do I regret going? Not even a little bit. I still have trouble describing in New Zealand in words. It’s a country of unadulterated, dazzling scenery.

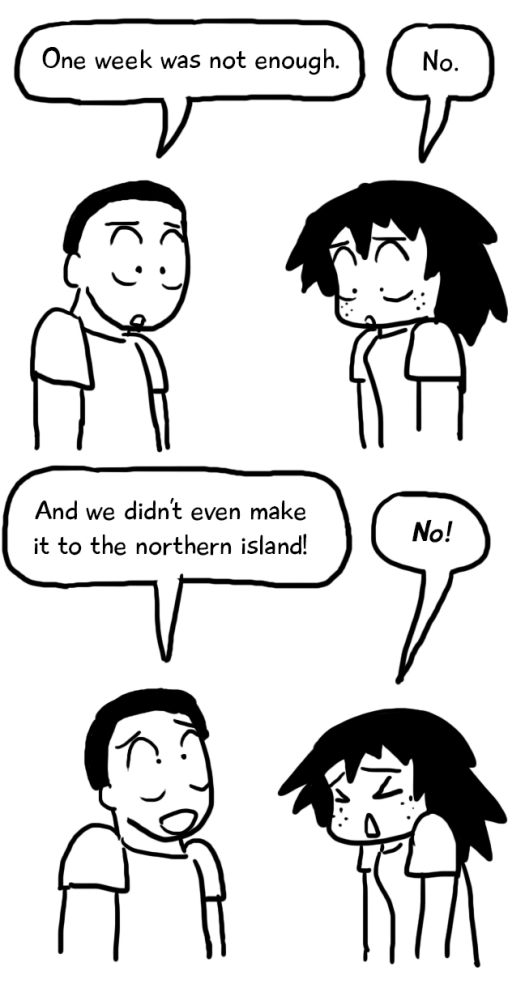
Future travelers, be warned: your dream trip in New Zealand might not be perfect . But hopefully, with these tips, your campervan trip will smoother than mine. Keep a rough plan and book things ahead of time. At the same time, though, give yourself time to enjoy everything to its fullest. Honestly, all the time in the world isn’t enough for New Zealand. And we only saw half of it.

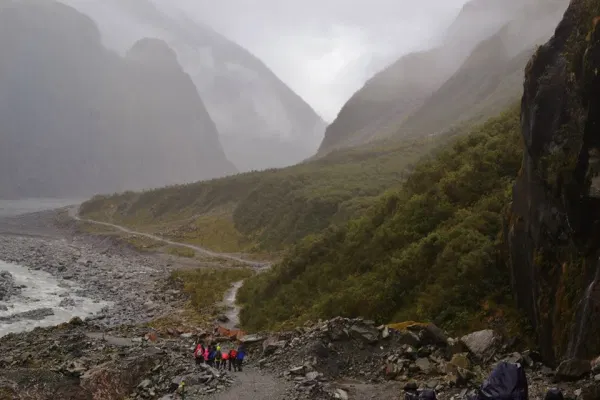
Hiking to Fox Glacier on a rainy day.

Hiking to Fox Glacier on a rainy day.

Along the Hooker Valley Track, New Zealand.

Along the Hooker Valley Track.

Near Akaroa, New Zealand.

Near Akaroa.

post 183 image 45

Good luck with your travels!


Edit: Hey all, I got a great comment from a New Zealand native on driving in the country. I think it’s great to know, so I’m including it here. She’s also talked about it on her blog

“Kia ora Vy.

Well done for choosing the South Island to go to. All us kiwis ask tourists when we see them – ‘Are you going to the South Island? You HAVE to see the South Island while you’re here, it’s the best of New Zealand scenery!! I’m really sorry you got a lemon camper van – this is a good thing to know, so we can advise others ourselves.

A word to tourists heading our way – there is quite a big fuss being made in New Zealand at the moment about tourist drivers. Several have caused accidents lately that have killed New Zealanders, and we’re not very happy about that. Many kiwis are calling for a special driving test for overseas tourists before they can drive on our roads. Because they ARE very windy and narrow a lot of the time, not what those who come from countries with straight roads and many lanes are used to. There are two things us locals want you to know:

PULL OVER!! If you have 3 or more cars behind you when you’re driving, pull over as soon as you can do so safely. You may be on holiday, but we’re probably trying to get to work. Not pulling over can cause people to get frustrated and do dangerous overtaking manouvres to get where they’re trying to go. Potential accident!

If you’re tired, DON’T DRIVE!! Tiredness can lead to you pulling out into wrong lanes in confusion. Potential accident!

We love having tourists here because we’re very proud of our country and want you to see it. But please don’t come over here and kill us. Thank you, and happy holidaying.

Regards, New Zealand locals. 😀 “

Drive safely, everyone! Take your time and don’t rush, no matter where you’re going. 

How a cosplay n00b made a Hylian shield (a photo tutorial)

A while back, I made a Master Sword. A really crappy one, but a sword nonetheless.

And recently, with PAX East coming up, I decided I needed a shield to match.  A nice, classic, Hylian Shield.

The only problem is– and I am literally copying and pasting what I said when I made the Master Sword–

That’s right.

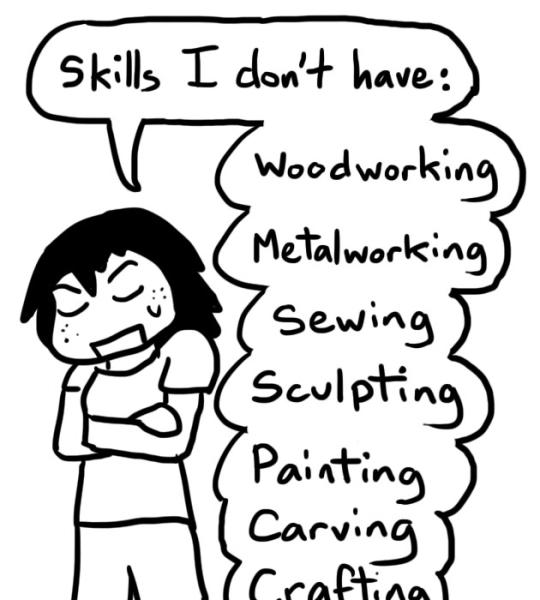
I’m a beginner. 

As a result, my Hylian Shield is nowhere near professional level. I actually messed up quite a few times. But a couple people at PAX asked me how I made it, so I decided, why not? Maybe my amateur skills can help cosplayers in the future.

post 117 image 1

I was actually planning to make my shield out of foamboard– the same foamboard I used for my Master Sword— but realized that it wouldn’t work. I mean, it would work, but it wouldn’t be durable. Cons are brutal and have a tendency to totally beat up cosplay props.

post 117 image 3

Reality is cruel.

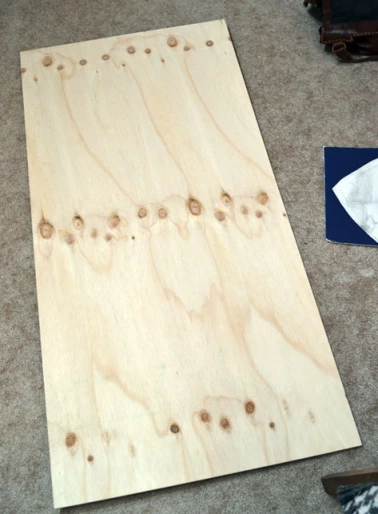
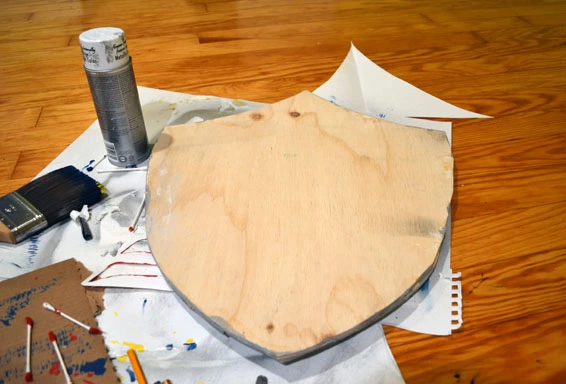
Anyway, I chose to make my shield out of wood instead! Nothing crazy– just some standard, thin plywood you can nab at any hardware store. I won’t be fighting real battles with this thing, but it should be able to take a day of running around a convention center.

post 117 image 2

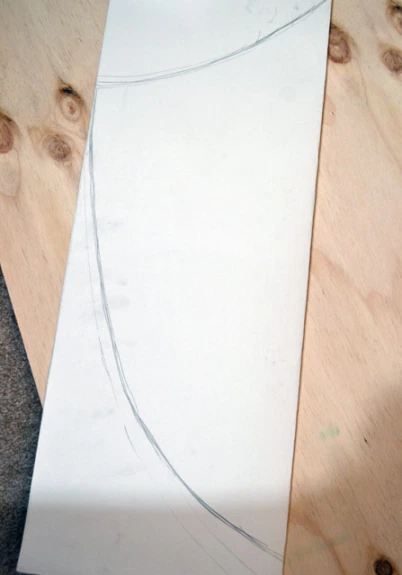
I drew half a shield on a giant piece of paper, folded in half. Cutting it out this way will ensure that your shield is properly symmetrical!

post 117 image 4

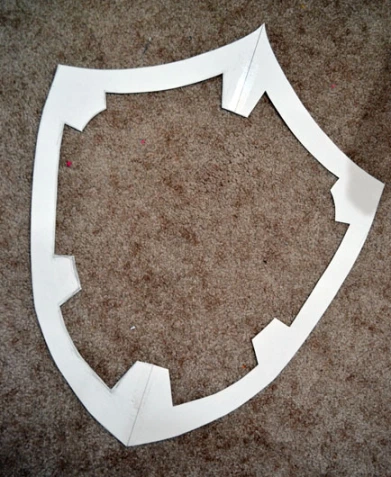
See how the Hylian Shield has that nice silver border? After cutting the shield shape out, I hand-copied the border shape onto my stencil and cut that out as well. Keep it folded when you do so that the border is also symmetrical!

post 117 image 5

Using this stencil, I drew two shapes on my plywood: One for the shield, and one for the border. Now, on to the power tools!

post 117 image 6

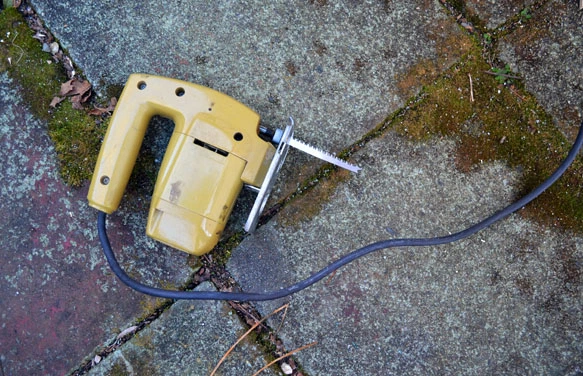
I learned how to use a jig saw in middle school tech class, but not everyone does. If you do end up using a jig saw, be safe about it! Heck, back when I made my Master Sword, my dad was too scared to let me use the jig saw.

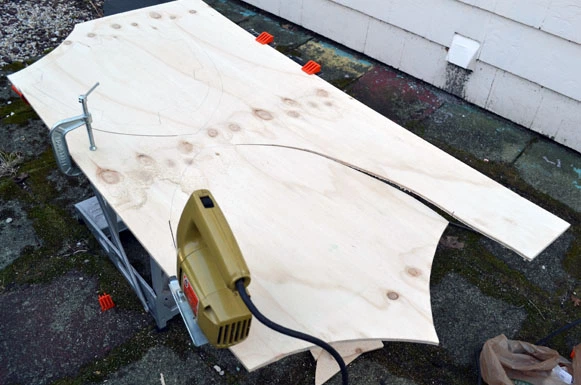
So, I started cutting out the shapes.

post 117 image 7

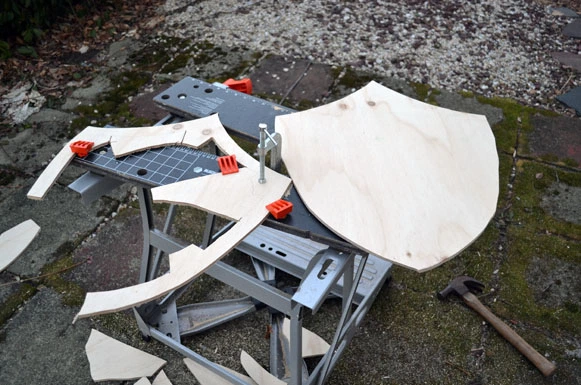
I did it pretty slowly. The whole cutting process took me about two hours– partly because I’m a n00b, partly because I was terrified of cutting myself, and mostly because I didn’t want to mess it up. I didn’t want to screw up the shape, and rushing it would do just that!

post 117 image 8

post 117 image 9

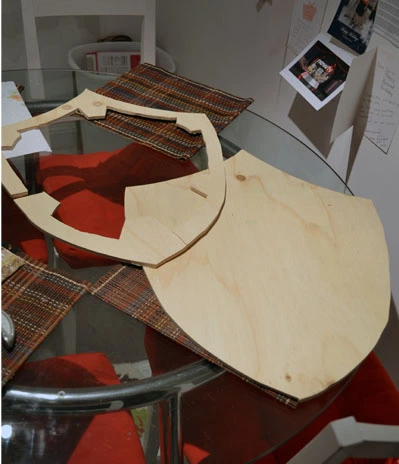
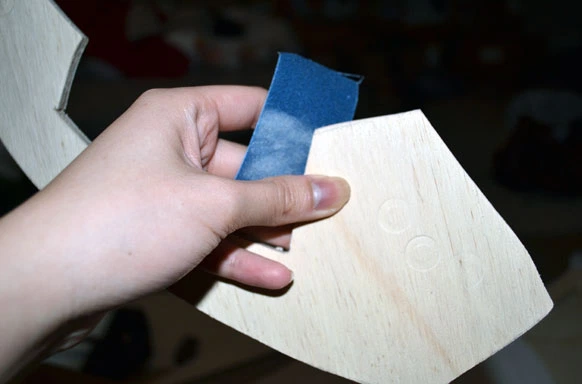
I’m not a big fan of splinters, so I sanded down the edges.

post 117 image 10

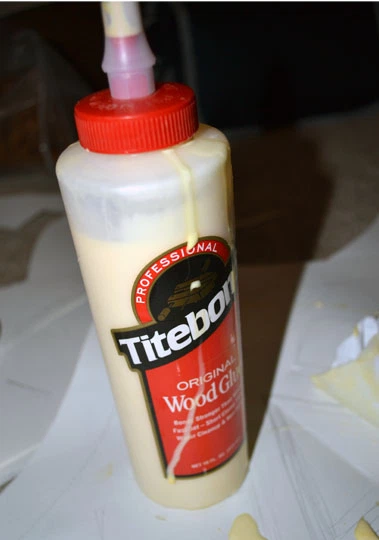
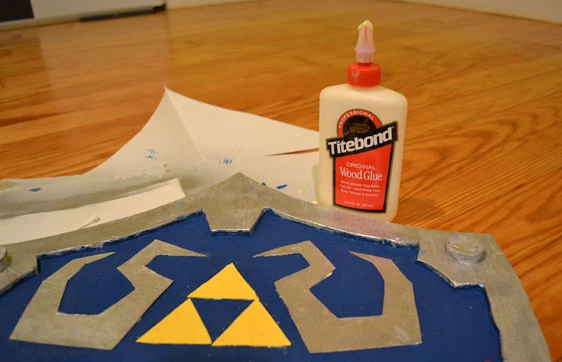
I grabbed some wood glue that I found lying around the house.

post 117 image 11

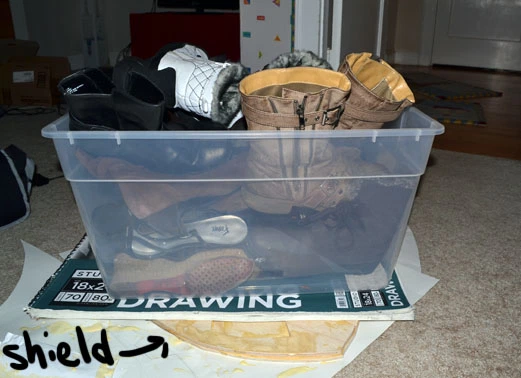
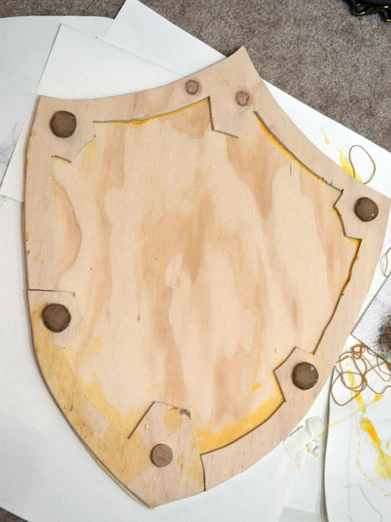
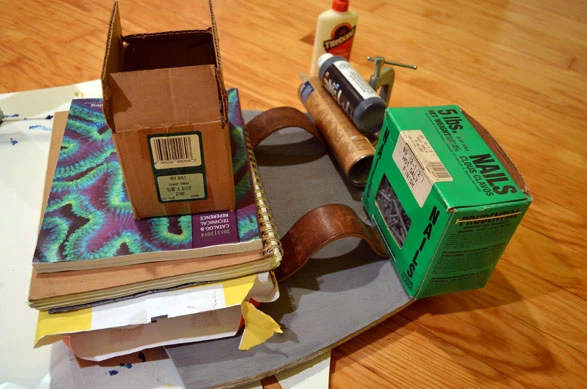
And I pasted the shield border on top of the shield body. I left the glue to set overnight. Although I was supposed to clamp the wood down while it dried, I only had one clamp. My solution: stick a heavy object on top of the shield instead.

post 117 image 12

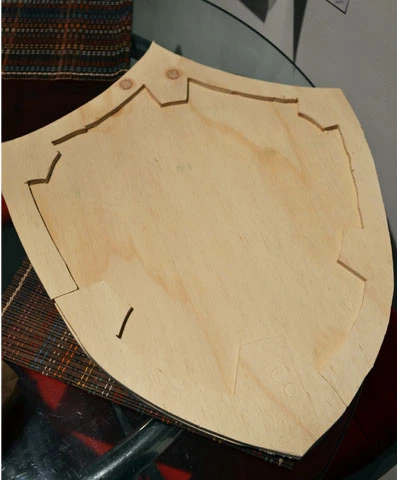
Now, my shield looked a little like this:

post117 image 12

My skills have limitations, though. At this point, I realized that my shield looked a little 2-D. Real shields have a nice curve to them, so it fits a little better on the arm. I wanted a curved shield. How do I get a curved shield?

post 117 image 13

(For those who do want to try to bend their plywood, steam-bending looked the simplest! It especially wouldn’t work for me, though, since my wood glue isn’t waterproof.)

I know my limits. I was simply going to have to deal with a flat shield.

My shield needed a little embellishment, though. I went outside and found this decaying pole.

post 117 image 14

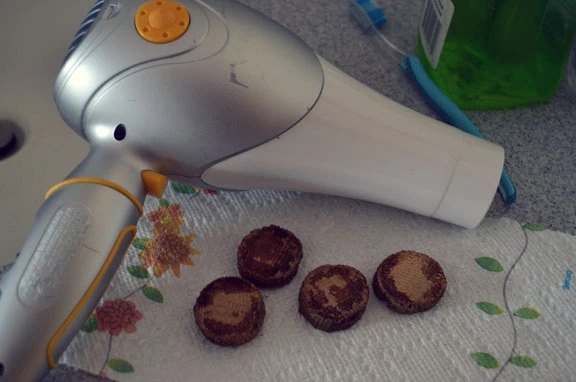
Using an ordinary handsaw, I hacked off some little wooden medallions of grossness. They were wet from being outside, so I used a hairdryer to dry them out and then sanded them down.

post 117 image 15

Using the wood glue, I pasted them on!

(In all honesty, though, you’ll probably be better off going to a craft store and buying some little wooden circles. Save yourself the trouble!)

post 117 image 16

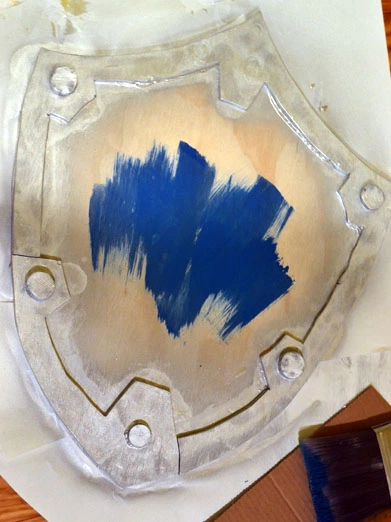
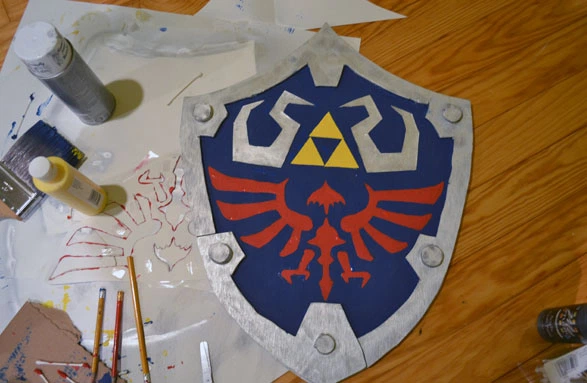
It’s painting time! Using some silver spray paint, I painted the border. I then used some really cheap acrylic paint to color the center blue.

post 117 image 17

On some thin cardboard (not corrugated) I cut out the triforce and those border shapes around the triforce and painted them yellow and silver, respectively. Using wood glue, I pasted them on as well.

post 117 image 18

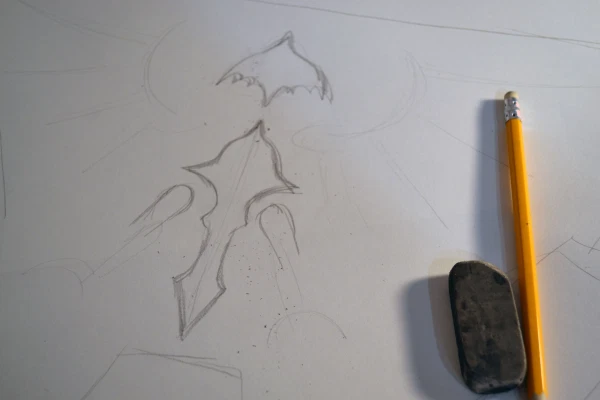
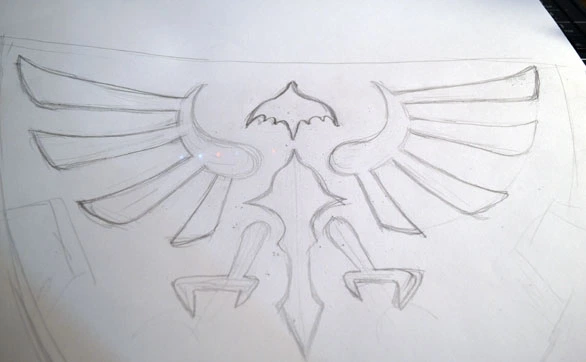
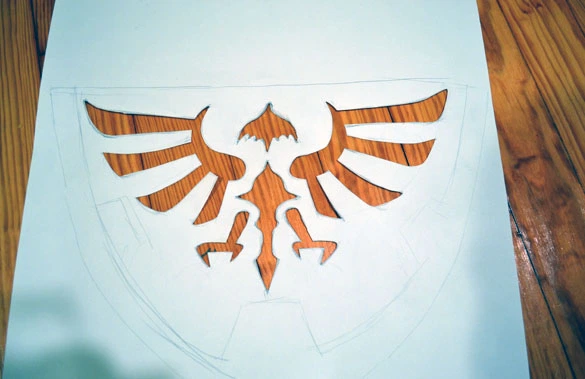
The Hylian crest was going to be a tad trickier, though. I ended up drawing myself a stencil by hand. It may be easier to just print out a picture from the internet, though!

post 117 image 19

post 117 image 20

post 117 image 21

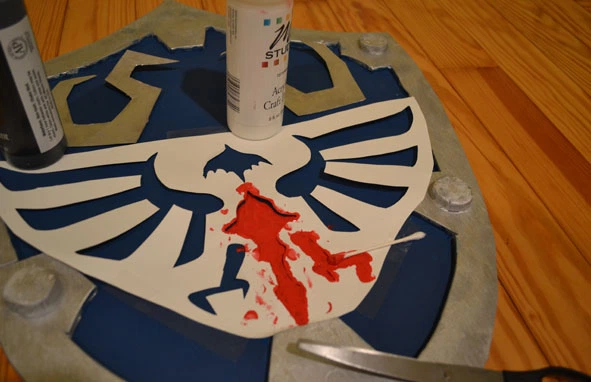
And anyway, my stencil didn’t work too well. I couldn’t find a good way to tape all the little wings and corners properly, so trying to paint it was a messy ordeal. In the end, I had to carefully smooth my stencil work painting by hand.

post 117 image 22

But you know, after re-painting the edges of the crest, I thought it looked pretty ok.

post 117 image 23

The back of the shield was still looking a little wooden, though.

post 117 image 24

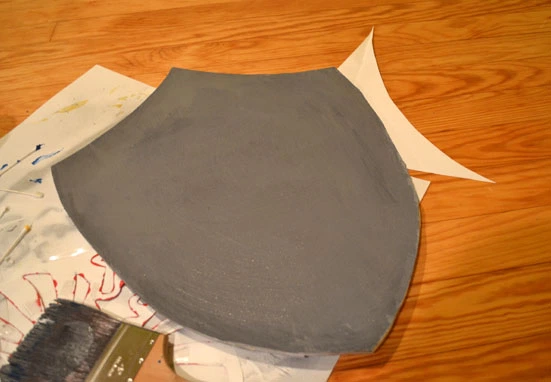
I mixed myself some paint and painted the back gray.

post 117 image 26

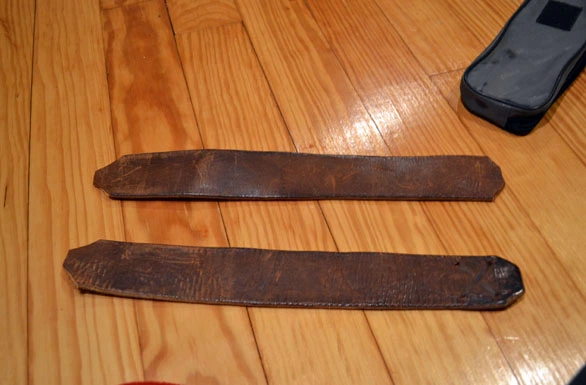
Now, all I needed was a way to carry the shield around! I took an old leather belt that I thrifted and cut it in half.

post 117 image 27

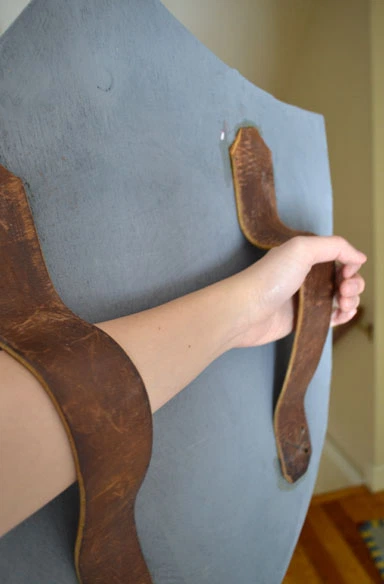
Using some wood glue, I pasted the straps to the back of my shield. I didn’t glue them down completely flat, since I needed room for my arm to slip in. Once again, my lack of clamps led me to more unconventional methods of holding things in place:

post 117 image 28

I used wood glue, but I don’t recommend it! The straps started coming off after two days of convention-going. There are special glues designed for adhering wood to leather, which may perform better.

At the time, I didn’t realize this. All I knew was: hey, this actually seems to work!

post 117 image 29

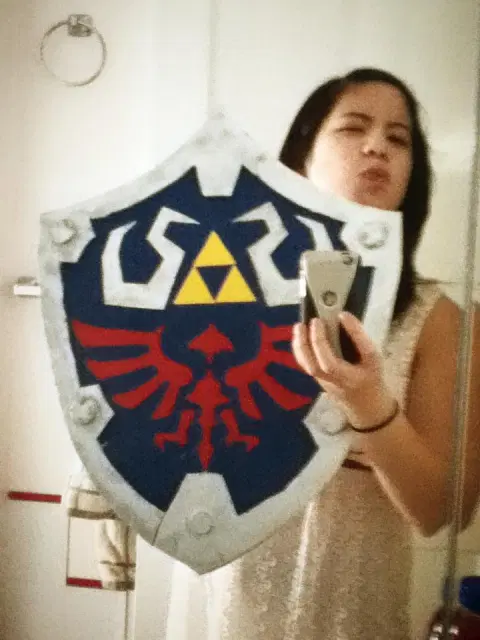
And so, the shield is finished!

post 117 image 31

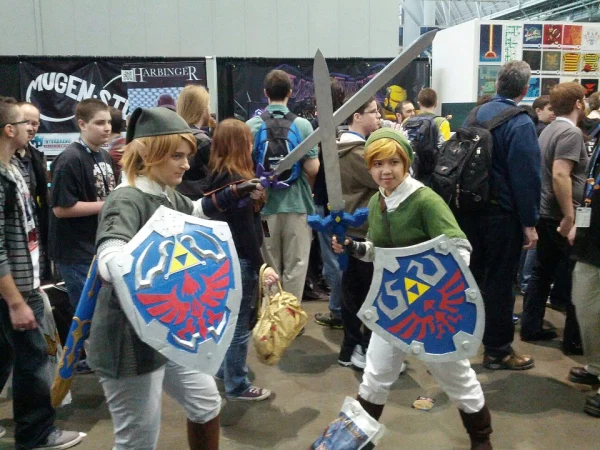
To see it in action, have a photo my friend snapped of me and another Link at PAX East! I know my costume ain’t too great, and there are still some things I need to fix up, but I really did try my best with it!

post 117 image 30

I’m the Link on the right!

This isn’t the most beautiful, impressive, or professional Hylian shield. But I think that, for my limited skill, it got the job done. To the aspiring Link cosplayers: I hope this helped, even if just a little! And remember, Link is a very popular character to cosplay. There are tons of tutorials online, from the casual youtube to the hardcore cosplay.com. This is a shield you can replicate at varying levels of detail and difficulty, so find a technique that you’ll be able to pull off!

post 117 image 32

6 ways to make your study abroad more awesome

When I went abroad to Germany, I was pretty nervous. I would be living with a family I had never met before. I didn’t know anything about German culture. I was determined to make my trip a success, but still had some reservations.

post 106 image 1

Being an exchange student is not a competition, but some kids definitely do better than others. Every trip is different. Some students aren’t ready to go abroad. Some familes aren’t ready to host. The organization I went through, Youth for Understanding (YFU) tried to teach us how to make our travels successful. We went through a pre-departure orientation, an arrival orientation, and even an orientation at the end of our trip— let me just say I’ve had enough icebreakers to last a lifetime.

They offered some advice, which I offer to you now. Not all exchange students have the luxury of being over-orientated like I was, so they have nothing to dispel their worries.

So, I present…

post 106 image 2

…a list of 6 quick, messy tips!

1. Eat ALL the things!

Food is important! When you’re abroad, your host parents may cook for you, or buy food for you, or take you out to eat. If you don’t like a food, fine– but try it at least once. Your family wants to share their culture with you, and food is a huge part of that culture.

I met an Indian-American girl who became an extreme example of this when I went to Germany:

post 106 image 3

Not that I’m saying that anyone should give up vegetarianism, especially if it’s important to you. However, be ready to try new things! Go to your country with an open mind. Remember, you’re the odd man out here. You’re going to have to adapt to your new country, just as they have to adapt to you.

2. Expect nothing.

After I announced I was going to Germany, everyone had expectations for me.

post 106 image 4

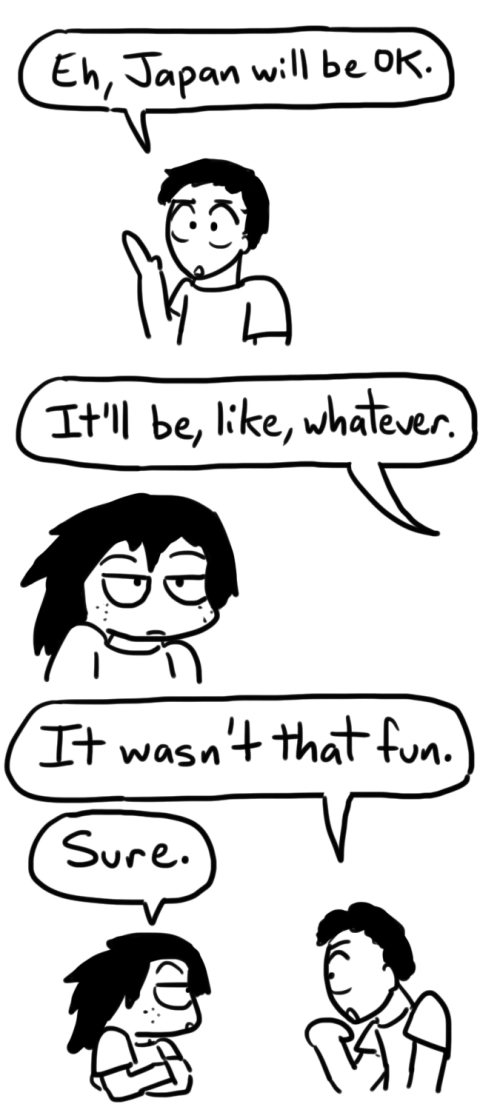
Although I applied to go to Japan, I was sent to Germany instead. Though I was a little disappointed at the time, in retrospect it was a good thing. I’m obsessed with manga (surprise!) and I therefore had a very unrealistic view of what my Japan trip would be like.

post 106 image 5

This might sound pessimistic, but if you go in with overly high expectations, you may be disappointed. Not all students have the best experience. Before I went to Japan, my Japanese tutor who went on the same trip frequently told me,

post 106 image 6

And this isn’t a bad attitude, either. When you have no expectations– none at all– you can go in and appreciate every experience for what it is, instead of thinking about how much better it could be. I went to some amazing places in Germany, but I also spent a lot of time just hanging around my host family. Both ends of the spectrum, to me, were equally valuable.

3. Hang with the natives.

Exchange students tend to stick together, which makes sense. In a strange, new land, there’s a group of people who speak your language, know your background, and understand the way you think. Who are you going to gravitate towards?

post 106 image 7

Running around and looking at famous sites is fun and all, but it doesn’t immerse you in the culture. The best way to learn about your host country is to talk to people who know it the best– the people who have lived there their entire life. At the very least, try not to be a “guest” to your host family. Help around the house, hang out, and talk to them!

Talking to natives can be a bit difficult, though, which brings me to the next two points:

4. At least attempt to learn the language

and

5. Don’t be afraid to sound like an idiot.

My German host family speaks English, so I was able to speak with them fairly well. I tried hard to learn a bit of German, though. I even purchased a phrasebook before departure. One of the phrases I still remember:

post 106 image 8

I did became frustrated when I met people beyond my host family. Not many of my host family’s friends or relatives spoke much English.

post 106 image 9

I did a little better when I went to Japan, since I had a slight knowledge of the language. Still, that didn’t stop me from speaking terrible Nihonglish. Some of the stuff that came out of my mouth was preeeettttyyy dumb.

Like during my homestay in Japan. I spent my homestay with another American girl, who’ll I’ll call “K” for anonymity.

post 106 image 10

So go! You don’t have to sound as dumb as me, but don’t be afraid to speak the language. Even if you get it wrong, people will appreciate the effort. It’s better to communicate a little rather than not at all!

But as you’re off adventuring, and learning new things, and seeing new places, a feeling– one of the most unexpected, gut-wrenching feelings– one that can and has sent kids home and ruined exchanges– is going to hit you.

6. You’re going to get homesick.

I’ve never been abroad for a extended period of time, so I don’t have much experience with this. But I can attest to the stress that comes with going abroad. The climate is different. The food is different. The language is different, forcing you to concentrate all day, every day. A lot of students experience exhaustion their first few days abroad.

When it really gets bad, I hear, is about three or four months into your exchange. By then, the “honeymoon” period of your exchange has worn off. The novelty is gone. Yet three months is a very short time within which to make friends (at least for me, but I am friend-making-ly challenged) so many students find themselves suddenly craving the familiarity of home.

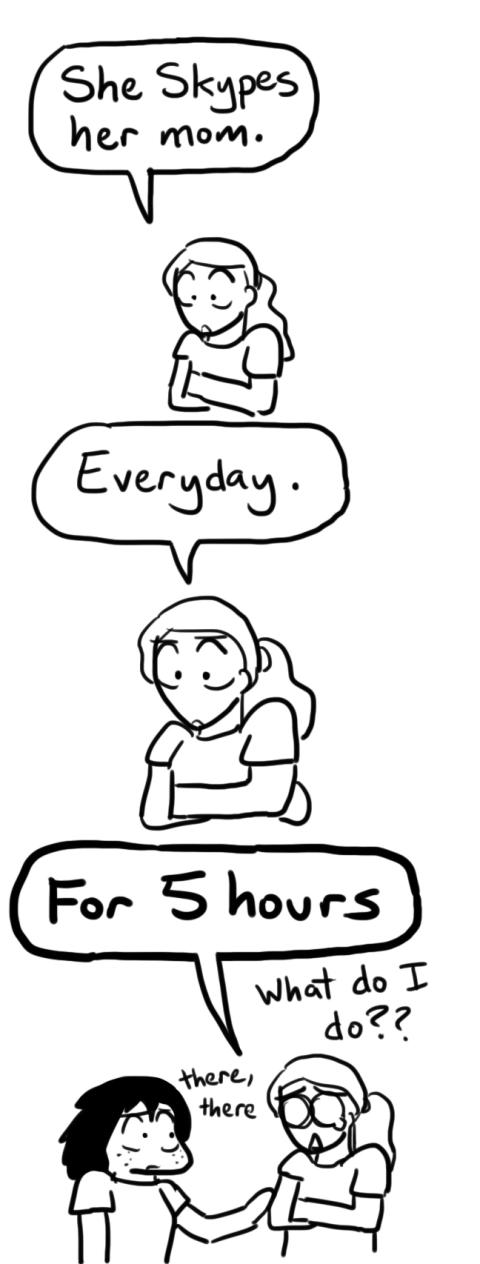
My best friend from high school hosted a girl from France for a year. Sure enough, a couple months into her exchange, my best friend confessed:

post 106 image 11

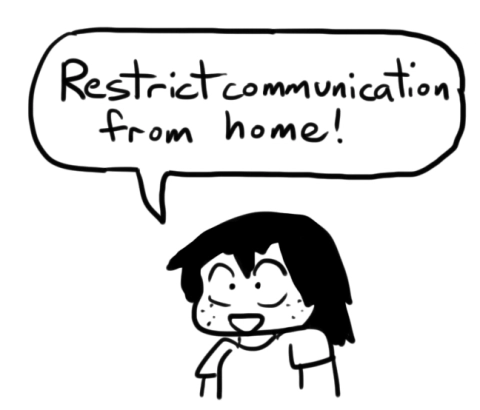
While you’re wrapped up calling home, though, you’re missing out on what’s going on around you. Time spent talking with your real family is time missed talking with your host family. YFU told us, many, many, times:

post 106 image 12

Because, more often than not, kids encounter this problem on their exchange. (They even told kids on short-term exchanges to leave their laptops behind, to avoid hiding behind a computer screen all day.)

When I went to Germany, I actually wasn’t expecting to get homesick. I was only there for six weeks. But sure, enough, when I Skyped my parents…

post 106 image 13

And then my friends…

post 106 image 14

Of course, I never got to the OMG-I’m-miserable-here-send-me-home-right-now point, but I did feel those pangs of homesickness. After you hit that low, though, your exchange slowly gets better and better until, by the end, you don’t want to go home anymore! And then you go home and get reverse culture shock, which is a whole other story.

I guess, in the end, all of these tips really boil down to one thing:

post 106 image 15

You can’t truly enjoy the country if you aren’t in the country. Not just physically there, but mentally there as well. Immerse yourself!

So, to all you prospective exchange students? Don’t be scared: go abroad! No two exchanges are alike– and some kids do have bad luck– but most kids have a blast abroad. (I did!) In the end, your experience is what you make of it. And the things you can learn from your experience… well, that’s a whole other post in itself.

Now go board a plane and spread your awesomeness elsewhere.

High schoolers! Don’t know where to start? I super-believe in studying abroad, so I’mma link to two organizations I know are legit:

Youth for Understanding (I used this one! If money’s an issue, there’s a ton of scholarships available, like the full-ride I got to Deutschland!)

AFS Intercultural Programs (A girl I knew used this one to go to Japan– they offer partial scholarships.)

How a cosplay n00b made the Master Sword (a photo tutorial)

Want to know how to make a Hylian Shield? Check out the tutorial here!

Before we begin, let’s start with some disclaimers.

It is indeed. Never before have I attempted to create, well, anything. 

Due to my lack of skills, I made a lot of mistakes and did a lot of guesswork during the whole process. The results are passable in photos (though not inch-for-inch accurate) but looks kind of ghetto up close. Good enough for me!

So let’s get started!

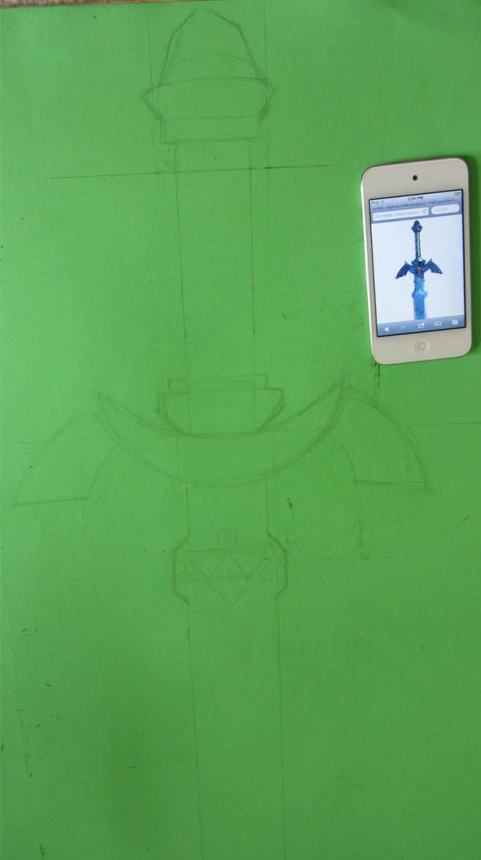
No project is good without proper planning, which is why mine turned out so horrendously. I decided to sketch the Master Sword on a piece of poster board, using this tutorial and this picture of the Master Sword for reference. This guy, in addition to carving the Master Sword out of wood, also provides a nice sketch of the sword with the proper dimensions.

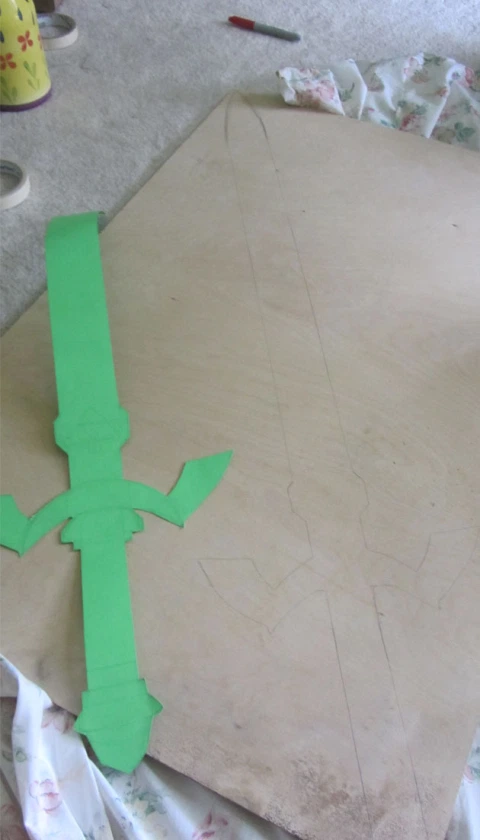
I cut out the design and traced it onto a piece of plywood.

Now to cut out the shape. I went to my dad for help…

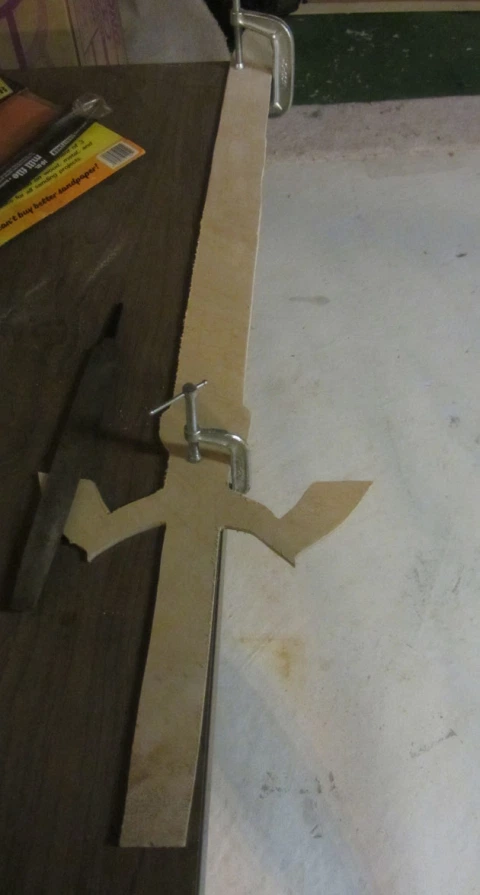
So, using the jigsaw, we cut the plywood into this sword-like shape.

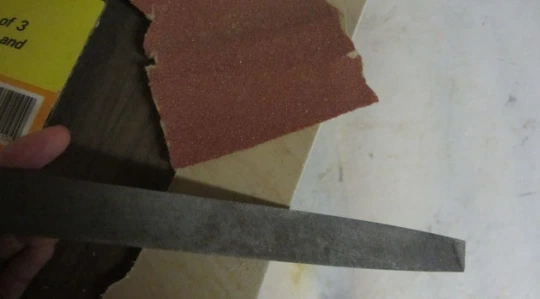
I then proceeded to smooth the edges with a file and some sandpaper…

Now, what to do? We have a nice piece of wood, but it’s a little flat. The handle, at least, had to be round!

And here’s where we get into failed idea #1:

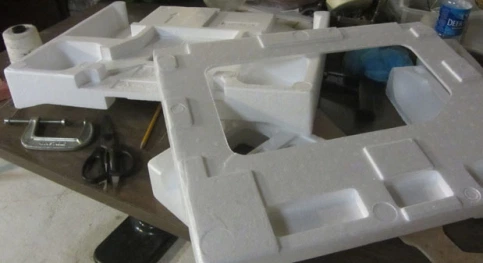
I thought maybe carving some of that packaging Styrofoam might work. As it turns out, Styrofoam is darn tricky to carve precisely. Plus, carving it makes the little Styrofoam bits rain like snow. Would not recommend. 

It’s time for attempt two. You’re going to have to excuse these poor iTouch photos, but here goes…

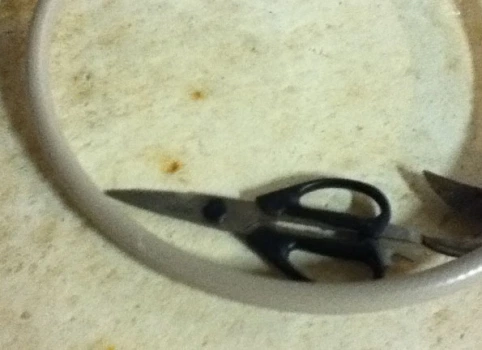
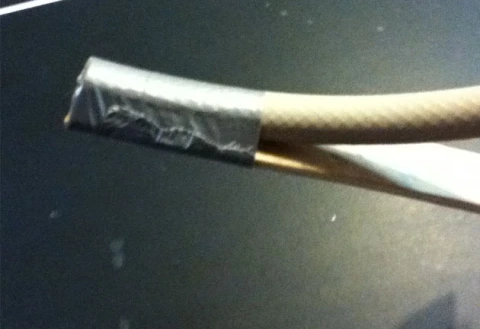
I cut off some rubber hosing and duct-taped it to the handle part of the sword, like so:

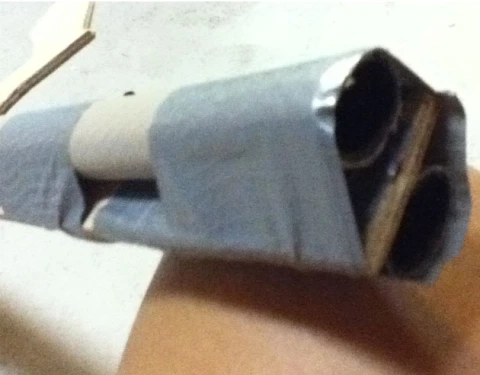
I did this for the other side of the wooden sword as well, so we ended up with the handle looking like this:

So the handle is now 3-D. Congrats! But what about those wings on the side? Those are still, regretfully, spectacularly flat.

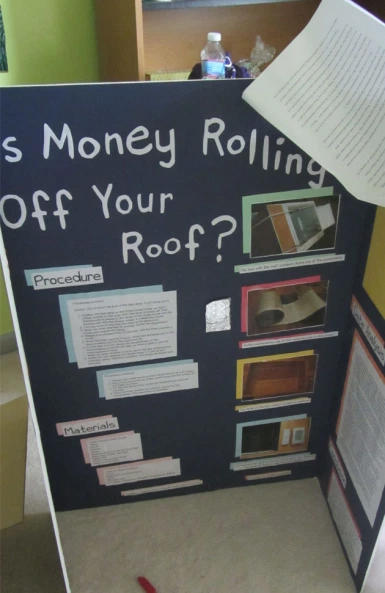
I somehow came across my 9th grade science fair project. Something about housing, and insulation, and the like. More importantly, my 9th grade science fair project was mounted on foam board:

I have no idea why I chose that title…

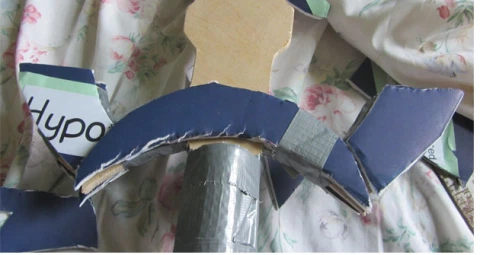
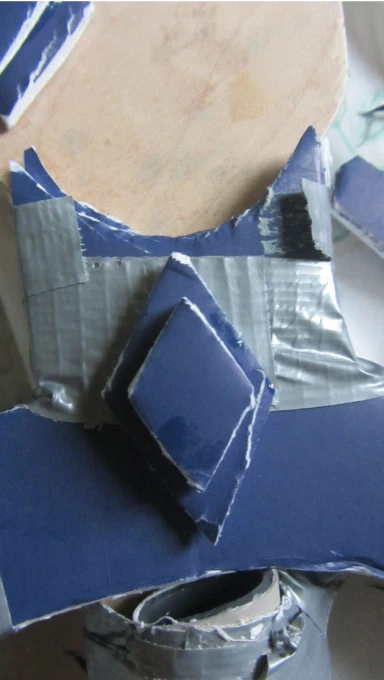
Using that same lime-green poster board template I had created earlier, I cut the shape of the wings out of the foam board and duct-taped it to the wooden frame. Like so:

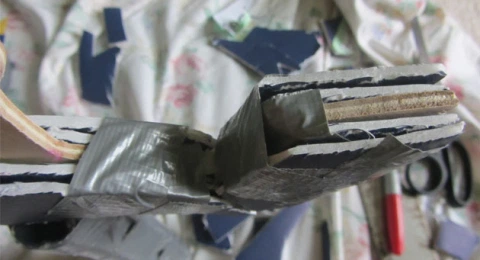
I did this for both sides of the wood. I proceeded to cut out more of the wing shapes, and tape it to the wood again, and again, and again, layering the foam board to make it less flat. It looked kind of like this:

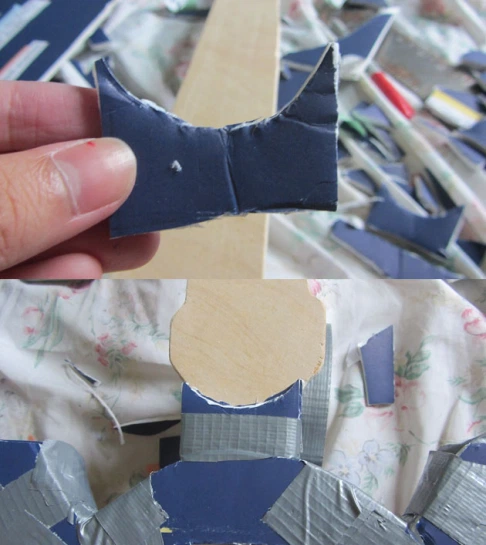
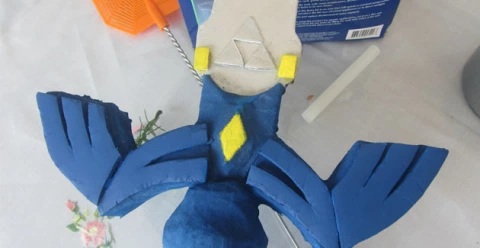
I also cut out this little shape for right above the wings…

…and also this diamond-type thing.

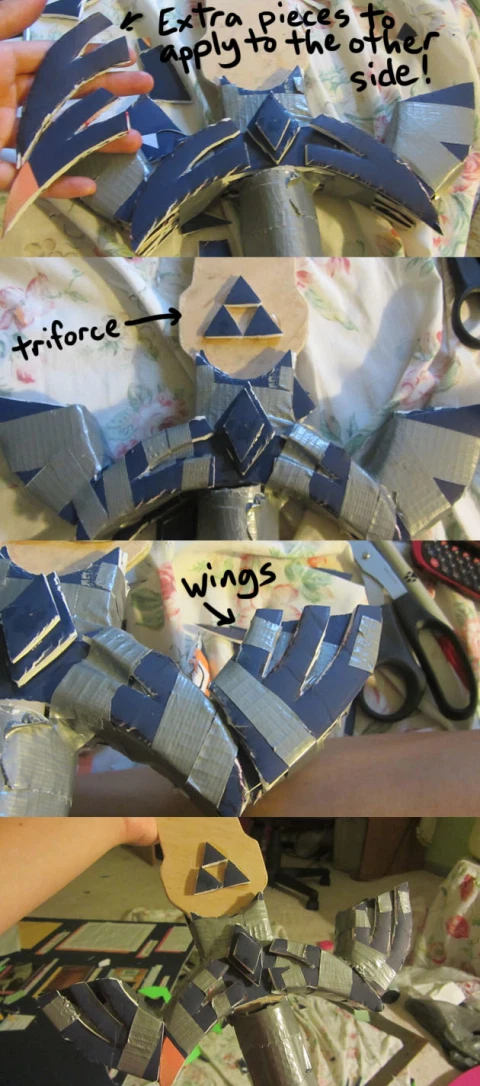
I thought this might be a swell time to add some details to the wings. Using total guesstimation (sorry– I don’t have a proper pattern for this one) I cut out one more layer of foam board. I’ll let the pictures speak for themselves.

The bottom of the hilt is still woefully unadorned, though. What to do?

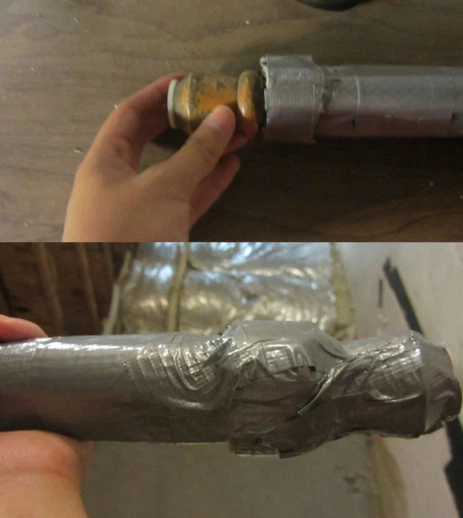
First, I cut out some short segments of that same rubber hose, like this:

I wrapped 4 or 5 of these around the end of the hilt, so it looked like this:

…and then I wrapped it in duct tape.

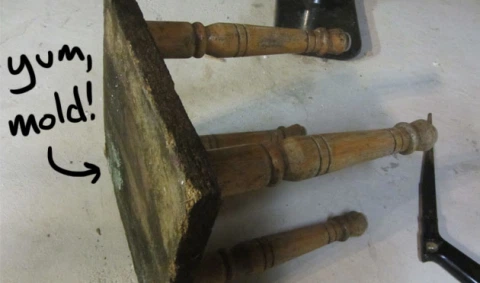
That wasn’t enough, though– the Master Sword has a fun little nub at the end. I turned to this decaying stool I had dragged off the street. (Dumpster diving, hooray!)

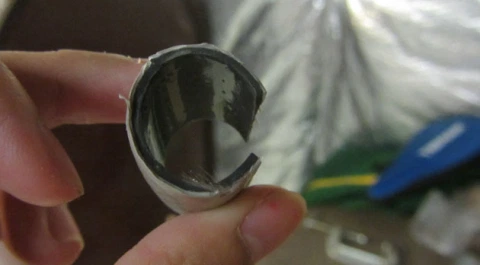
I sawed off the end of one of the legs…

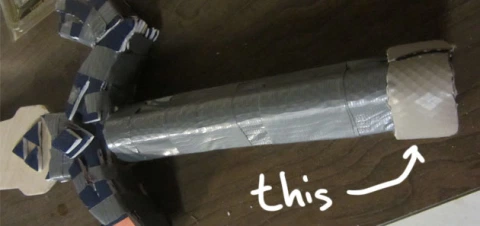
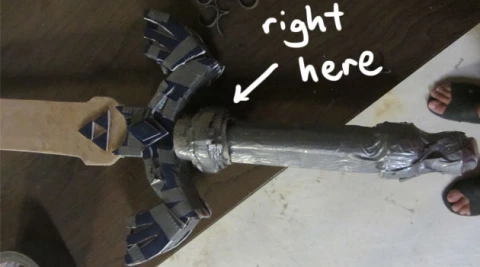
…and attached it to the end of the hilt. With more duct tape.

Using the same cut-some-rubber-hose-layer-it-onto-the-sword-smother-it-in-duct-tape technique, I added another decorative lump to the handle close to the wings.

This Master Sword is looking a little patchworky, though. Solution: Add more duct tape!

There’s just one little problem, though: duct tape is tough. It’s waterproof. NASA astronauts have even repaired their spacecraft with it. As you’d expect, then, paint just rolls right off this stuff. Any water-based paint isn’t going to work on this duct-tape store.

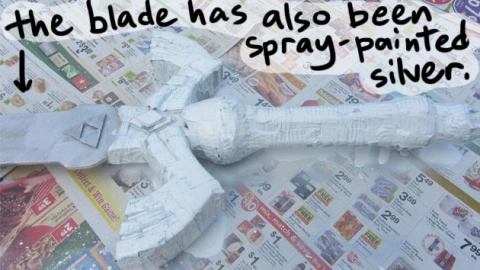
My solution? Well, as a starter, I sprayed the entire thing down with plastic primer, resulting in a white, sticky hilt that smelled terribly of paint thinner.

Technically, now, paint will stick to the duct tape due to the primer. However, the plastic primer also caused the duct tape to start to peel and fall apart. Uh-oh.

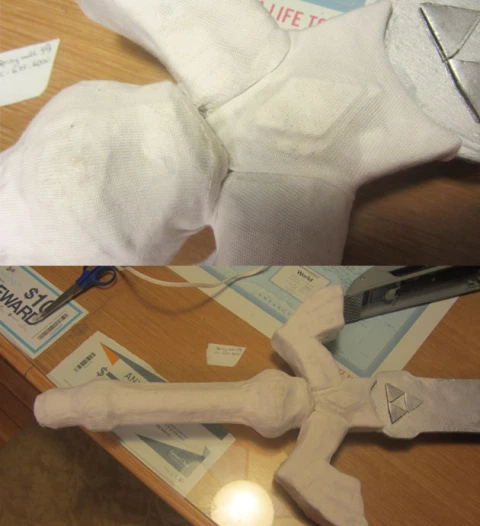
So– very carefully, and very slowly– with the help of my skilled mother– I wrapped the hilt in a thin white cloth. The details I had cut on the wings were covered, but at least the hilt is now paintable!

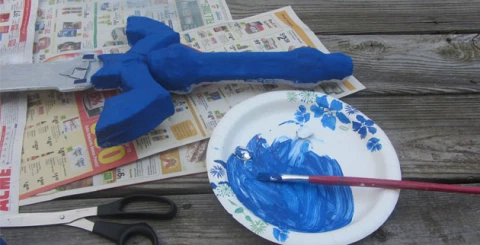
Finally! It’s painting time! Using some acrylics, I painted the hilt blue:

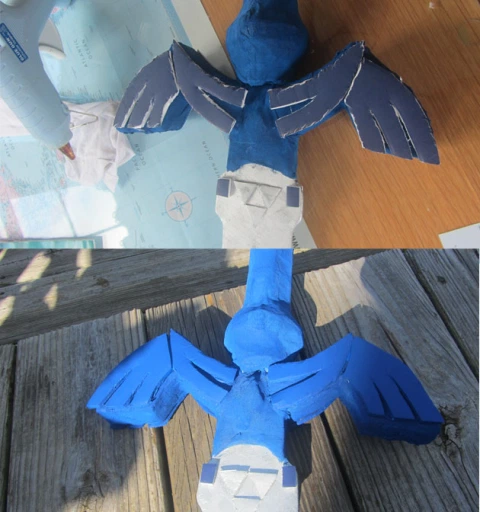
Since the details on the hilt were lost when we wrapped the sword in cloth, I re-cut them out of foam board and pasted it on again:

Some yellow details, also painted with acrylics:

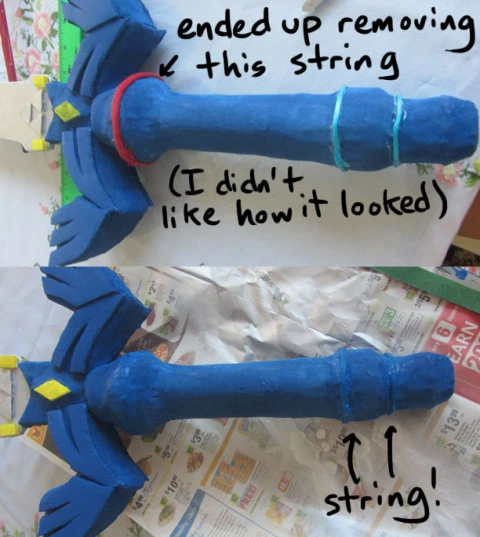
The bottom of the hilt was still looking a unshapely, though. I glued some string around the hilt, and painted over that as well.

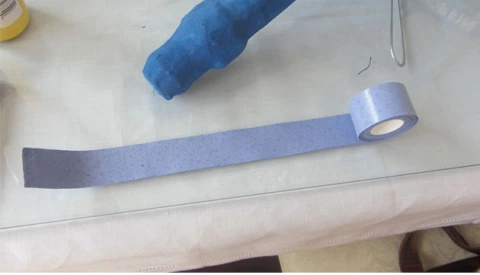
And finally, the green wrap around the handle! I played tennis in high school, so I still had some tennis grip lying around. And this same tutorial said it works pretty well.

I cut the tape down the middle to get the right width…

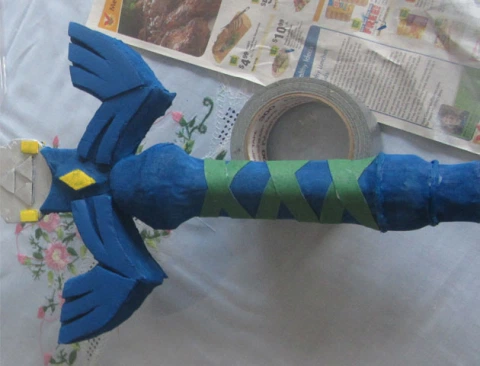
…and cut out two strips. I painted the strips green, and wrapped one around the handle:

The other strip I wrapped around in the opposite direction, resulting in this:

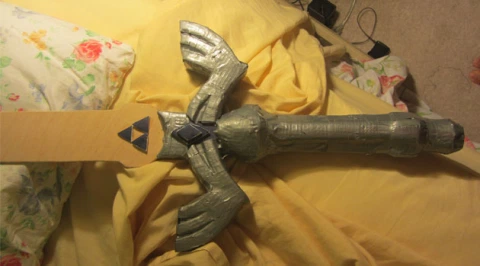
And, finally finally finally, after an embarrassingly large amount of work that spanned several days, it is done! A Master Sword by a amateur cosplayer! 

And that’s how I made my first prop, ever. It’s not that sturdy and doesn’t look so great up close. I definitely took much more time than what was probably needed, and went through much more trouble than I probably had to. But you know what? I’m happy with the result.

If you do happen to be a Link cosplayer trying to make the Master Sword, however, I hope this helped even a bit! I know I get most of my cosplay help online, which is why I decided to write this post. The cosplay.com forums, in particular, has tons and tons of advice from experienced cosplayers.